NORCENT and AOC - LT2725 LCD TV - SERVICE MODE -
 How to enter Service mode [Factory Mode] to AOC LT2725 and Norcent LT2725 LCD TV - SMPS and Audio Output Schematics - Adjustments - Password reset - Parental Control Adjustments.
Used ICs: TC2001
- TP2050 – HJM2199 – STR-A6252 – SI-8120 – FP130
To
set or change the password
Enter
the old password and then enter the new password.
Confirm
new password.
The
default password is: 0000
Parental
control
Before
enter the parental control menu, key in the password first. The user can set the restricted table about
MPAA or TV rating separately.
The
default password is: 0000
Press
the EXIT button to exit from this adjustment mode.
Factory
mode [Service Mode]
In the TV mode adjust volume to zero and
press number key 9 8 7 6.
It will achieve the factory mode. Select
the item of White Balance and press right key to enter it.
White balance adjustment
In the White Balance you can adjust 8 items.
1-3 items is RO, GO, BO > R, G, B Bias adjust.
4-6 items is RG, GG, BG > R, G, B Gain adjust.
7 item needn't adjust
8 items is Bias (Low luminance)
adjustment:
1. Set the raster pattern (Black pattern with 1024×768) Input.
2. Adjust the brightness on OSD until chroma 7120 measurement reach the lowest
value. colour temperature select: Cool, Normal, and Warm.
Gain adjustment
A. Adjust Cold colour-temperature:
1. Set the Contrast of OSD function to 80 and Adjust Brightness to chroma-7120
Y>350 cd/m2
2. Switch the chroma-7120 to RGB-mode (with press “MODE” button)
3. Switch the MEM. channel to Channel 01 (with up or down arrow on chroma-7120)
4. The LCD-indicator on chroma-7120 will show x =291, y =306, Y>350cd/m2
5. Adjust the 4 item: RG, until chroma 7120 indicator reached the value R=100
6. Adjust the 5 item: GG, until chroma-7120 indicator reached the value G=100
7. Adjust the 6 item: BG, until chroma-7120 indicator reached the value B=100
8. Repeat above procedure until chroma-7120 RGB value meet the tolerance =100±2
9. Switch the chroma-7120 to x, y, Y mode with press “MODE” button to check the colour temp is in SPEC. or not.
10. Enter the 8 item to select another colour temperature to adjust.
B. Adjust Normal colour-temperature
1. Set the Contrast of OSD function to 80 and Adjust Brightness to chroma-7120
Y>350cd/m2
2. Switch the chroma-7120 to RGB-mode (with press “MODE” button)
3. Switch the MEM. channel to Channel 03 (with up or down arrow on chroma-7120)
4. The LCD-indicator on chroma-7120 will show x =299, y =315, Y>350cd/m2
5. Adjust the 4 item: RG, until chroma 7120 indicator reached the value R=100
6. Adjust the 5 item: GG, until chroma-7120 indicator reached the value G=100
7. Adjust the 6 item: BG, until chroma-7120 indicator reached the value B=100
8. Repeat above procedure until chroma-7120 RGB value meet the tolerance =100±2
9. Switch the chroma-7120 to x, y, Y mode With press “MODE” button to check the colour temp is in SPEC. or not.
10. Enter the 8 item to select another color temperature to adjust.
C. Adjust Warm colour-temperature
1. Set the Contrast of OSD function to 80 and Adjust Brightness to chroma-7120
Y>350cd/m2
2. Switch the chroma-7120 to RGB-mode (with press “MODE” button)
3. Switch the MEM. channel to Channel 04 (with up or down arrow on chroma-7120)
4. The LCD-indicator on chroma-7120 will show x =308, y =324, Y>350cd/m2
5. Adjust the 4 item: RG, until chroma 7120 indicator reached the value R=100
6. Adjust the 5 item: GG, until chroma-7120 indicator reached the value G=100
7. Adjust the 6 item: BG, until chroma-7120 indicator reached the value B=100
8. Repeat above procedure until chroma-7120 RGB value meet the tolerance =100±2
9. Switch the chroma-7120 to x, y, Y mode With press “MODE” button to check the colour temp is in SPEC. or not.
10. Enter the 8 item to select another colour temperature to adjust.
Switch different source
Press the source key on the remote control to switch different source to adjust
the AV, HDMI, CONPONENT 480i
and COMPONENT 480p mode.
Press “Exit” button on remote control to quit from factory mode.
 NORCENT [OLEVIA] - LT26HVX-LCD TV - POWER SUPPLY [SMPS] - SCHEMATIC (Circuit Diagram)


 NORCENT [OLEVIA] - LT26HVX-LCD TV - POWER SUPPLY [SMPS] - SCHEMATIC (Circuit Diagram)

 How to enter Service mode [Factory Mode] to AOC LT2725 and Norcent LT2725 LCD TV - SMPS and Audio Output Schematics - Adjustments - Password reset - Parental Control Adjustments.
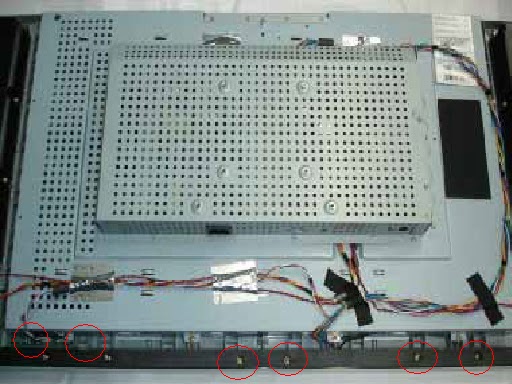
 NORCENT LT2722 DISASSEMBLE PROCEDURE


 NORCENT LT-2722 - POWER SUPPLY SCHEMATIC [CIRCUIT DIAGRAM] - Password
Reset - Factory Mode [Service Mode] - Universal Remote Control Set-up
Codes
NORCENT LT-2722 - POWER SUPPLY SCHEMATIC [CIRCUIT DIAGRAM] - Password
Reset - Factory Mode [Service Mode] - Universal Remote Control Set-up
Codes


 Norcent LT3225 – AOC LT3225 - LCD TV - SMPS and AUDIO OUTPUT SCHEMATIC


