Apple Clamshell iBook – Disassembling procedure - CD Rom removal - battery removal – Ram replacement – Key board removal – Laptop repair and service
Category: Laptop Repair and Service
Contents of this article
- Battery removal
- Key board and touch pad removal
- CD ROM removal
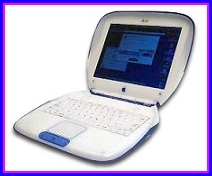
Apple Clamshell iBook
DISASSEMBLING PROCEDURE
Battery Removal
Using a large flathead screwdriver, turn the
two battery locks to the left to unlock the battery compartment. Remove the
battery cover.

Grasp the plastic piece from the battery, and
pull up to remove the battery.

Keyboard Replacement
Before proceeding, you must first remove:
Battery
Pull the left and right keyboard tabs in
towards you, and lift the keyboard up and flip towards you. (The picture only
shows the right tab being pushed in, but it is easier if both are done at the
same time.)

Remove the two Philips head screws as shown.
(Note – If an airport card is installed, it will have to be removed first.)

Press the airport card holder down and then
towards you to release the spring.

Insert your index finger under the plastic
tab of the keyboard connector, and gently pull up. (If the connector does not
come out easily, gently wiggle from side to side while pulling up.)

Ram Replacement
Before proceeding, you must first remove:
Battery Keyboard
This step does not require removal of the
keyboard. To remove ram, gently pry back the two metal connectors on each side
of the ram chip as shown. (Only one side is shown, but it is easier is both are
pried back at the same time.) The ram chip will “pop” up. Grasp it, and gently
pull it out of its socket.

Trackpad and Ribbon Cable Assembly Replacement
Before proceeding, you must first remove:
Battery Keyboard
This step is extremely important Grasp the
orange trackpad cable (under keyboard), and gently remove it from its socket.
If this is not done now, then it will rip later on.

Remove the three Philips head screws as shown.

This is a very important step Close the iBook
and turn it upside down. Using the end of a screwdriver or paper clip, push in
the eject button to open the cd drive. This will reveal the Philips screw as
shown. Remove the screw.

Using a Torx T8 Screwdriver, remove the four
torx screws as shown.

Remove the two torx screws as shown. (Also
located on the bottom side of the casing.)

Working your way from the bottom right hand
side around to the top right hand side, pry the trackpad up. This take some
initial force to get the connectors to undo, but after you’ve gotten the bottom
right hand side up, work from that point to remove the rest of the trackpad.
This step can be tricky, so be careful. (Never use too much force!)

Before the trackpad can come completely off,
you must undo it from the speaker connector. Grab both sides of the wire and
pull. It should come out very easily.

CD-ROM Replacement
Before proceeding, you must first remove:
Battery Keyboard Trackpad
Using a Torx T8 screwdriver, insert the end
into the “open screw” as shown. Push down and turn to undo the screw.

Undo the orange ribbon cable by grasping one
side as shown and pulling up.
