REPAIRING AND NOT THROWING AWAY

Richtige Fernseher haben Röhren!

Richtige Fernseher haben Röhren!

In Brief: On this site you will find pictures and technical information about Service Modes, Circuit Diagrams, Firmware Update procedure, Disassemble procedure, Universal remote control set-up codes, Troubleshooting and more....

If you go into the profession, you will obtain or have access to a variety of tech tips databases HERE IT IS Master Electronics Repair !.

These are an excellent investment where the saying: 'time-is-money' rules. However, to learn, you need to develop a general troubleshooting approach - a logical, methodical, method of narrowing down the problem. A tech tip database might suggest: 'Replace C536' for a particular symptom. This is good advice for a specific problem on one model. However, what you really want to understand is why C536 was the cause and how to pinpoint the culprit in general even if you don't have a service manual or schematic and your tech tip database doesn't have an entry for your sick TV or VCR.

While schematics are nice, you won't always have them or be able to justify the purchase for a one-of repair. Therefore, in many cases, some reverse engineering will be necessary. The time will be well spent since even if you don't see another instance of the same model in your entire lifetime, you will have learned something in the process that can be applied to other equipment problems.
As always, when you get stuck, checking out a tech-tips database may quickly identify your problem and solution.In that case, you can greatly simplify your troubleshooting or at least confirm a diagnosis before ordering parts.

Happy repairing!
Today, the West is headed for the abyss. For the ultimate fate of our disposable society is for that society itself to be disposed of. And this will happen sooner, rather than later.

How to use the site:

- If you landed here via any Search Engine, you will get what you searched for and you can search more using the search this blog feature provided by Google. You can visit more posts scrolling the left blog archive of all posts of the month/year,
or you can click on the main photo-page to start from the main page. Doing so it starts from the most recent post to the older post simple clicking on the Older Post button on the bottom of each page after reading , post after post.

You can even visit all posts, time to time, when reaching the bottom end of each page and click on the Older Post button.

- If you arrived here at the main page via bookmark you can visit all the site scrolling the left blog archive of all posts of the month/year pointing were you want , or more simple You can even visit all blog posts, from newer to older, clicking at the end of each bottom page on the Older Post button.
So you can see all the blog/site content surfing all pages in it.

- The search this blog feature provided by Google is a real search engine. If you're pointing particular things it will search IT for you; or you can place a brand name in the search query at your choice and visit all results page by page. It's useful since the content of the site is very large.

Note that if you don't find what you searched for, try it after a period of time; the site is a never ending job !

..............The bitterness of poor quality is remembered long after the sweetness of todays funny gadgets low price has faded from memory........ . . . . . .....
Don't forget the past, the end of the world is upon us! Pretty soon it will all turn to dust!

©2010, 2011, 2012, 2013, 2014 Frank Sharp - You do not have permission to copy photos and words from this blog, and any content may be never used it for auctions or commercial purposes, however feel free to post anything you see here with a courtesy link back, btw a link to the original post here , is mandatory.
All posts are presented here for informative, historical and educative purposes as applicable within fair use. NOTHING HERE IS FOR SALE !

Friday 30 October 2020

SONY WRT 807B - UHF SYNTHESIZED WIRELESS MICROPHONE SCHEMATIC DIAGRAM, TROUBLESHOOTING, DISASSEMBLE AND REASSAMBLE PROCEDURE


LCD readout of various information
The microphones LCD shows the current channel number, frequency, input attenuation setting, and residual battery power.
The accumulated battery use time is also indicated (in oneminute increments) to allow precise monitoring of battery use.
Automatic saving of channel and input attenuation settings
All channel and input attenuation settings are automatically saved when the microphone is turned off (and are maintained even when the battery is removed), thus eliminating the need to make the same settings again the next time you use the microphone.
Highly reliable electronic attenuator
Adjustable in a range of 0 dB to 21 dB in 3-dB steps, the built-in input level attenuator reduces signal distortion during the input of excessively strong audio signals.
Tone signal-incorporated RF carrier signal
The microphone transmits an RF carrier signal that incorporates a tone signal to enable any tuner with a tone squelch circuit to pick out only the target audio signal.
Wide dynamic range and low noise
The microphones compander (compressor/expander) system enables transmission over a wide dynamic range with minimum noise.

• When operating two or more microphones, keep the microphones separated from each other by a distance of at least 30 cm (1 foot).
• Keep the microphones at least 3 meters (10 feet) away from receiving antenna.

CH (channel) indication
Displays the transmitting channel.
Each time you press the SET button in Transmit mode, the channel indication changes as follows.

Transmitting channel: The current transmitting channel setting.
Transmitting frequency: The current transmitting frequency setting.
Attenuation: The input attenuation setting in decibels.  Can be set within a range of 0 dB to 21 dB in 3-dB steps.
Accumulated battery use time: The accumulated time of battery use (in 1-minute increments).

SET button
In Transmit mode, press this button to change the indicated items in the lower half of the liquid-crystal display.
To change to Setting mode, turn the POWER switch to ON while holding this button down. Then press this button to select the items to be indicated.

Initiating Setting Mode

Enter Setting mode to change the transmitting channel, the transmitting frequency and the attenuation level, or to reset the accumulated battery use time indication.
To enter Setting mode
While holding down the SET button, turn the POWER switch to ON.
Hold the SET button down until an indication appears on the liquid-crystal display.
The microphone enters Setting mode and the indication before the microphone was previously turned OFF flashes on the liquid-crystal display.
Pressing the SET button cycles the modes in the order of Channel selection mode, Frequency selection mode, Attenuator adjustment mode and Accumulated time indication reset mode.
Note
On the model available in Europe, the transmitting channels are grouped in four sets as shown in “Sony Wireless Microphone System Frequency List.”

[On the model available in Europe, set the channel group indication (the left two digits) first. Press the + or – button to toggle the channel group (e.g., for CE62 model: 00 y 62 y 63 y 64) and press the SET button. Then, the remaining four digits start to flash for setting the channel number]

Changing the Transmitting Channel

The transmitting channel can be selected through either the channel number or the frequency.
1 Set the microphone to Setting mode.  If the channel number (or frequency) indication does not appear,
(or)
press the SET button until the channel number frequency) indication appears.

Changing the Input Attenuation Setting

The input attenuation setting can be changed within a range of 0 dB to 21 dB (in 3-dB steps) in either Setting mode or Transmit mode.

Changing the input attenuation in Setting mode
1
Set the microphone to Setting mode.
2 If the attenuation level is not displayed, press the SET button until it appears.
3 Press the + or – button to change the attenuation setting.

4 Once the desired level appears, turn the POWER switch to OFF to release Setting mode, or press the SET button to continue operations in Setting mode.

The next time you turn on the microphone (by turning the POWER switch to ON), the microphone enter Transmit mode with the selected attenuation setting

Changing the input attenuation in Transmit mode
You can also change the input attenuation setting while transmitting
If button in Transmit mode.
1 the attenuation level is not displayed, press the SET until it appears.
2 Press the + or – button to change the attenuation setting.

Resetting the Accumulated Battery Use Time Indication

The accumulated battery use time is the total time (in hours and minutes) the battery has been used. It is recorded whenever the WRT-807B is on.
Reset the indication to 00:00 whenever you replace the battery.
1 Set the microphone to Setting mode.
2 If
4 Turn the accumulated battery use time is not displayed, press the SET button until it appears.
3 Press the – button.
The indication resets to 00:00.

Press the + button while the 00:00 indication is on to go back to previous value.

Troubleshooting

Disassembly procedure


Reassembly procedure

EEPROM (IC202, DP-306 board) replacement

When replacing EEPROM (IC202) on the DP-306 board or replacing DP-306 board, perform the following operation.
When the power is turned on initially after the replacement:
1. “Error 11” is indicated on the display.
2. Turn off the power. Next turn on the power again.
Confirm that “CE57B” (for CE57 model) is indicated on the display.
Confirm that “CE62B” (for CE62 model) is indicated on the display.
Confirm that “CE67B” (for CE67 model) is indicated on the display.
Confirm that “U30B” (for U30 model) is indicated on the display.
Confirm that “U42B” (for U42 model) is indicated on the display.
Confirm that “U62B” (for U62 model) is indicated on the display.
Confirm that “U66B” (for U66 model) is indicated on the display.

How to make a AF input cable

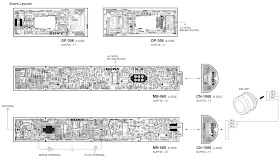
Schematic diagram and PWB layout


PWB

Thursday 22 October 2020

JVC HD 70FH97, JVC HD 70FN97 HOW TO ENTER THE SERVICE MODE SERVICE ADJUSTMENTS, LAMP TIMER RESET, HOW TO REPLACE THE LAMP


JVC HD-70FH97, HD-70FN97 D-ILA PROJECTION TELEVISION

LAMP UNIT : TS-CL110UAA

PRECAUTION FOR LAMP UNIT
The lamp emits high intensity white, ultraviolet and infrared light. Do not look directly at the light during service.
Also, do not touch the lamp directly as it presents a burn hazard.
Handle with extra care. This lamp emits high heat and contains high-pressure during use.
Do not give any impact as this may cause the broken lamp.

HOW TO CONFIRM LAMP OPERATING TIME.
• MAXIMUM COUNT TIME= 65535 hours
(1) Set to "0 minutes" using the [SLEEP TIMER] key.
(2) Press the [VIDEO STATUS] key and [DISPLAY] key simultaneously, then enter the SERVICE MODE.
(3) When the SERVICE MENU SCREEN is displayed, press [2] key to enter the SELF CHECK MODE.
(4) The use time of a lamp is displayed on middle of the screen by the hexadecimal number of 4 figures.

LAMP UNIT REPLACEMENT.
(1) The lamp replacement message will appear when need to change the lamp. After replace the lamp, need to reset the timer which is built into TV.
(2) Lamp use time can be check at the lamp message MENU.
If lamp use time exceeds 5000 hours, the message below will be displayed on a screen.
(3) If this message appears when turn the TV on, need to replace the lamp.
(4) Use the lamp timer reset only after replacing the lamp.

This message will appear every time turn on the TV, when the lamp needs to be replaced. 

Press the [OK] key to make the message disappear, or replace the lamp.

HOW TO REPLACE THE LAMP UNIT.

Turn off the TV power.
(2) After the LAMP LED light has stopped blinking, disconnect the power cord from the AC outlet.
(3) Loosen 1 screw then take out the lamp cover below the left side of the TV.
(4) Loosen 2 screws then take out the lamp unit.
(5) Install the new lamp unit.
(6) Re-install the lamp cover.
NOTE:
• After installing the new lamp unit, do not forget to reset the lamp timer.

HOW TO RESET THE LAMP TIMER.

Press the [MENU] key to select CLOCK / TIMERS.
(2) Select the <LAMP TIMER RESET> with UP/DN keys.
(3) Enter the <LAMP TIMER RESET> mode, the following message will appears.

PRESS OK TO RESET THE LAMP TIMER”

(4) Press the [OK] key while the above message appears on the screen.
(5) The lamp timer has now been reset, and the following message will appear.

THE LAMP TIMER IS RESET SUCCESSFULLY”

OPTICAL / DRIVE ASS'Y CONSTRUCTION

Kit part number:  TS-COP13A-SAA

Kit part name:  OPTICAL / DRIVE ASS'Y

OPTICAL / DRIVE ASS'Y CONSTRUCTION
(1) OPTICAL BLOCK
(Included D-ILA DEVICE, PROJECTION LENS)
(2) OPTICAL BASE
(3) DRIVE PWB ASS'Y
This PWB is mounted with 1 memory IC saved with adjustment, setting data of the drive circuit.
(4) SHIELD COVER
*The following parts without the kits part.
• REMOTE SENSOR PWB ASS'Y
• LAMP UNIT
• LAMP FAN DUCT
• THERMOSTAT

PRECAUTION FOR USING.
(1) In the case of the following defects/problems, replace this kit (OPTICAL/DRIVE ASS'Y).
a) Picture defect caused by optical system/D-ILA device related parts.
b) Picture defect caused by drive circuit.
(2) The DRIVE PWB ASS'Y is mounted with a memory IC
[IC3753] saved with adjustment/setting data(GAMMA, SHADING, etc.) of the drive circuit.
The data of this memory IC is in the optimal state according to individual D-ILA devices and each section of the OPTICAL BLOCK.
(3) When replace the DRIVE PWB ASS'Y, take off the 1 memory IC from the original board and replace with new one. When replace the DRIVE PWB ASS'Y, do same manner. Replace 1 memory IC.
(4) After the replacement of the OPTICAL BLOCK, projection lens focus adjustment and drive convergence / projection adjustment are required.

SCREEN STORAGE
Store the SCREEN ASS'Y in a standing position in order to avoid deformation. If the screen is stored horizontally, there is risk of deforming the screen face.
When necessary to place the SCREEN ASS'Y horizontally, position the screen side upwards and sure to place spacers between the screen and resting site (floor or stand etc.) to prevent the screen from sagging.

 SPECIFIC SERVICE INSTRUCTIONS

SYSTEM SETTEING

“Be sure to carry out the following operation at the end of the procedure.”

Set to "0 minutes" using the [SLEEP TIMER] key.
(2) While "0 minutes" is displayed, press the [
VIDEO STATUS] key and [DISPLAY] key simultaneously, then enter the SERVICE MODE.
(3) When the SERVICE MENU SCREEN is displayed, press [2] key to enter the self check mode.
(4) Turn off the power by pressing the [POWER] key on the remote control unit.

FEATURES
Built in ATSC (Advanced Television Systems Committee)
TUNER
This TV can receive both Digital broadcasting (ATSC) and Analogue broadcasting.
D.I.S.T. (Digital Image Scaling Technology)
This system uses line interpolation to double the number of scanning lines and achieve high resolution, flicker-free picture.
SMART CAPTION
Smart caption will appear when you press the MUTING button, only on channels where the broadcast contains CLOSED CAPTION information.
VIDEO STATUS
Expression of a favorite screen can be chosen by the VIDEO STATUS function.
DIGITAL INPUT
Digital-in will display when any picture signal in Digital-in is displayed.
V-CHIP
Since the V-CHIP is built in, it can choose, view and listen to a healthy program.

MTS STEREO
The voice multiplex function of the MTS system is built in. (MTS = Multi channel Television Sound system)
MPEG Noise Reduction
This function effects the block noise removal and mosquito NR simultaneously.
MaxxBass
This function emphasizes the bass sound.
A.H.S.+
Adds a more spacious surround sound. Music gives basic effect, and movie for more effect.
VOICE ENHANCEMENT
Gives a clearer sound quality of the voices in what you are watching.
NATURAL CINEMA
Watching the movie or animation, press the Natural Cinema to adjust the out line of the images to make thin more sharp.
VIDEO INPUT LABEL
This function is used to label video input connections for the onscreen displays.


PROJECTION UNIT

ADJUSTMENT PREPARATION

(1) There are 2 ways of adjusting this TV : One is with the REMOTE CONTROL UNIT and the other is the conventional method using adjustment parts and components.
(2) The adjustment using the REMOTE CONTROL UNIT is made on the basis of the initial setting values. The setting values which adjust the screen to the optimum condition can be different from the initial setting values.
(3) Make sure that connection is correctly made AC to AC power source.
(4) Turn on the power of the TV and measuring instruments for warning up for at least 30 minutes before starting adjustments.
(5) If the receive or input signal is not specified, use the most appropriate signal for adjustment.
(6) Never touch the parts (such as variable resistors, transformers and condensers) not shown in the adjustment items of this service adjustment.

MEASURING INSTRUMENT AND FIXTURES

• Oscilloscope
• Signal generator (Pattern generator) [NTSC / 525i / 525p / 750p / 1125i]
• TV audio multiplex signal generator
• Remote control unitADJUSTMENT ITEMS
FOCUS
• LENS FOCUS adjustment
DRIVE CIRCUIT
• DRIVE CONVERGENCE adjustment
• DRIVE CENTER POSITION adjustment
VIDEO CIRCUIT
• WHITE BALANCE (HIGHLIGHT) adjustment
MTS CIRCUIT
• MTS INPUT LEVEL adjustment
• MTS SEPARATION adjustment.

PRESET SETTING BEFORE ADJUSTMENTS

Unless otherwise specified in the adjustment items, preset the following functions with the REMOTE CONTROL UNIT.

HOW TO ENTER THE SERVICE MODE
(1) Set to "0 minutes" using the [SLEEP TIMER] key.
(2) While "0 minutes" is displayed, press the [
VIDEO STATUS] key and [DISPLAY] key simultaneously, then enter the SERVICE MODE

Before entering the SERVICE MODE, confirm that the setting of TV/CATV switch of the REMOTE CONTROL UNIT is at the "TV" side and the setting of VCR/DVD switch is at the "VCR" side. If the switches have not been properly set, you cannot enter the SERVICE MODE.
• When a number key other than the [1] or [9] keys is pressed in the SERVICE MENU SCREEN, the other relevant screen may be displayed.
This is not used in the adjustment procedure. Press the [MENU] key to return to the SERVICE MENU SCREEN.

HOW TO EXIT THE SERVICE MODE
Press the [ BACK ] key to exit the Service mode.

SERVICE MODE SELECT KEY LOCATION

ADJUSTMENT MODE
This mode is used to adjust the VIDEO CIRCUIT and the MTS CIRCUIT.
HOW TO ENTER THE ADJUSTMENT MODE
When the SERVICE MENU SCREEN of SERVICE MODE is displayed, press [1] key to enter the ADJUSTMENT MODE.

DESCRIPTION OF STATUS DISPLAY OF ADJUSTMENT MODE

CHANGE AND MEMORY OF SETTING VALUE

SELECTION OF SETTING ITEM
• [CH+] / [CH-] key.
Change the setting items up/ down.

S001 ==> T001 ==> M001 ==> F001 ==>D001 ==>Z001..

[SLEEP TIMER] key.
Switches to the next items.

S001 ==>T001 ==>M001 ==>F001 ==>D001 ==>Z001

CHANGE OF SETTING VALUE (DATA)
• [VOL+] / [VOL-] key.
Change the setting values up/down.

MEMORY OF SETTING VALUE (DATA)
Changed setting value is memorized by pressing [MUTING] key.

RGB BOX PATTERN MODE

This mode is used to adjust the DRIVE CIRCUIT.

HOW TO ENTER THE RGB BOX PATTERN MODE
When the SERVICE MENU SCREEN of SERVICE MODE is displayed, press [9] key to enter the RGB BOX PATTERN MODE.

Description of status display of TGB bod pattern mode

RGB BOX PATTERN
The checkered pattern is displayed. White is a synthesis of RGB.

ADJUSTMENT COLOR MODE
Presently selected ADJUSTMENT COLOR MODE is displayed.

SELECTION OF SETTING ITEM
• [CH+] / [CH-] key.
Move the selected RGB BOX PATTERN up/ down pixel by pixel.

• [VOL+] / [VOL-] key.
Move the selected RGB BOX PATTERN left/ right pixel by pixel.
• [SLEEP TIMER] key.
Adjusts the data reset.
• [DISPLAY] key.
Adjusts the selected COLOR BOX PATTERN.

“R =>B =>RGB

• [BACK] key.
Returns to the SERVICE MENU SCREEN from the RGB BOX PATTERN MODE.

MEMORY OF SETTING VALUE (DATA)
With the RGB BOX PATTERN MODE, the changed date is written in the MEMORY instantly.

Circuit board Voltage charts


Wednesday 21 October 2020

SANYO LCD 47XF5 LCD TV HOW TO ENTER THE SERVICE MODE, DEFAULT SERVICE MODE VALUES, SCHEMATIC DIAGRAM

Service Menu

This set has an On-screen Service Menu System included in the CPU that allows remote operation for most of the service adjustments

On-screen Service Menu System

Quick operation is needed to enter Service Mode.

How to enter the Service Menu
1. Press and hold the MENU button on Side Controls.
2. Keep pressing the MENU button and press the MUTE button on the remote control, and the FACTORY MENU will be displayed.
3. Select SERVICE by pressing (Up) or (Dn) button and then press( +) or ( - ) button to enter SERVICE menu.


How to select the service item and adjust data

1) Select “DATA” line by pressing (Up) or (Dn) button.

2) Press (+) or (-)  button to adjust data

To exit service mode
Press BACK button or MENU button to exit service mode.

Note: The all adjusted data in service mode will be memorized into EEPROM automatically.

Initial data [Default data]


Setting the Initial data
This adjustment is controlled by the CPU (IC8000) through the IIC Bus Data Line in the chassis, and those adjustment data are memorized the memory IC (IC8002). Therefore, Main board or the memory IC (IC8002) is replaced, these data will be disappeared. Readjust should be made. Initial data is provided in the CPU ROM, when the memory IC (IC8002) is replaced with new one. CPU ROM data is loaded into the memory. Initial data is provided to operating the monitor basically. For operating the monitor quality performance, further adjustment is required following chassis electrical adjustment.

1. Receive good quality signal.
2. Enter the Service Mode.
3. Confirm data value to be the same as the Service Adjustment Data Table. If it is different, change to correct data
4. Exit the Service Mode.

White balance Adjustment

Picture Mode: STANDARD
Color Temperature: NORMAL
Aging Time: More than 10 minutes

1. Enter the FACTORY MENU.

2. Select WHITE BALANCE by pressing (Up) or (Dn)  button, and then pressing ( + ) or ( - ) button to enter it.

3. To adjust Red : Press 1 (data value up) and 4 (data value down).
To adjust Green : Press 2 (data value up) and 5 (data value down).
To adjust Blue : Press 3 (data value up) and 6 (data value down).

4. Decide one item in three items to a fixed value (For example, let R be fixed value as following picture.), select item of other 2 colors (Example, G or B as following picture), and adjust to produce a normal black and white picture in highlight areas.
(Note: At this time, Adjust the other 2 colors data less than fixed data.)

5. Exit the FACTORY MENU

After adjustment, confirm white balance again by normal picture.

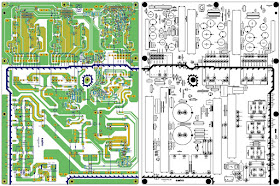
Schematic diagrams

Main board


Power board


Sunday 18 October 2020

HORIZONT 42LE5131, HISENSE RSAG7.820.5338 AND AOC MIP988A-K2 SMPS PSU BOARD SCHEMATIC DIAGRAMS

 Horizont 42LE5131D SMPS (power supply board) schematic


RSAG7.820.5338 SMPS (power supply board) schematic - Hisense 50H7GB1, 50H7GB, 50H7C


MIP988A-K2 SMPS (power supply board) schematic – AOC LC42S05M, AOC LC42505M, LCD-42CA330


Saturday 17 October 2020

HOW TO PROGRAM A UNIVERSAL REMOTE CONTROL TO A PANASONIC TV SET


Why universal codes needed for a Panasonic remote

Panasonic universal codes are required to link the gadgets with the universal codes. Each universal code is linked with a device. So, when you enter the right code, your remote automatically sink with the device and store the code. Next time you don’t have to follow a manual process to link the remote again.

Let’s get an idea about how to program your Panasonic remote.

How to program a Universal Remote Control to a Panasonic TV

Step 1: Switch on your TV set or DVD player

Step 2: Find the SEL and TV button. Press and hold down both buttons together for some seconds. The LED on the button will turn on.

Step 3: Hold your universal TV remote to face your Panasonic TV or DVD player you wish to turn on.

Step 4: Pick any of the universal remote codes for Panasonic above and enter the code.

Step 5: Press any of the functions keys on your remote control. If it works, that means you got the steps correctly. If it doesn’t work, repeat the steps and try with another code.

If you have any code that is not included in these, please help us add it to the comment box. We will really appreciate it.

How to connect Panasonic remote to DVD

In order to know how to connect your Panasonic remote to a DVD, you need to follow the following steps. Read the instructions carefully and follow the steps one by one.

Step 1: Turn on your device first.

Step 2: Now, on your remote control button, you will see e “DVD” or “aux” button, press the button. 

Step 3: Now, click and hold your RCU setup unless your device blinks twice.

Step 4: Click “9” “9” “9”. As a result, you will notice your device button blinks twice. 

Step 5: Now, to get the first code, click “1” on the remote and count how many times your device blinked. Keep this count in mind and don’t forget it.

If the blink is two times, then the first number of the code is 2. If your device did not blink, the first number of the code is 0.

Step 6: Now, to get the second digit, press “2”. Then, again count how many times the device blinked. Now, repeat the above process to get the remaining digits of the code. 

Step 7:  If you want to know the codes of other devices, simply follow the above steps. You only need to change the button with the appropriate one.

How to program Panasonic remote to Audio device

We will help you and describe every detail about how to program your device the right way. All you need to do is follow the steps carefully. The programming for Dvd or audio device is easy and effortlessly. 

Before you get into the programming, write a remote model number. We have done this because some devices use the model number in remote code.

The first step is to shut down the audio device that you are planning to program. Another essential thing to keep in mind is that your batteries should be fresh. You need to press the power and action button on your remote simultaneously now, hold down the button for 5 seconds and then release it in this way; your remote will enter into programming mode.

Now select your audio device and press the button and enter the code. Now click on the power button on the remote to test whether your device was connected or not. If it turns on, then the code you entered was right. If it fails to do so, enter other codes. Be sure you turn on the power of the audio device.

How to use the programmed remote

Now, you need to locate the code for your remote; you can consult the manual.

Now list down the codes and try them one by one. The listing will make your work easy and straightforward. 

Usually, the Panasonic remotes have a separate button for separate devices and one power button for the entire system. So, firstly turn on your audio device. The next step is to select the audio device on the remote. The final step is to turn on the button.

How to connect your Panasonic remote to HDTV

Are you planning to buy a Panasonic universal remote or have already brought the remote then, you have made the best decisions? It is the best device to keep your gadgets and remotes organised. 

Now, you don’t have to worry about changing the batteries of different remote regularly. Don’t need to panic now if you misplace your remote or are not able to find it. Connect your devices with this universal remote.  

In this article, we are going to talk about how to connect your Panasonic remote to HDTV. These steps are easy and straightforward. 

Steps to follow to program your Panasonic universal remote to HDTV

Follow the steps one by one: 

  • Firstly, turn on your Panasonic Hdtv. 
  • Now, press and hold the TV and SEL buttons for three seconds. You will notice light will blink. 
  • Now, enter the 3, 4 and 5 digit codes.
  • After this verify by pressing volume+ button. If your volume button increases the volume, then, the code you entered is correct. 
  • The final step is to press the TV button to store the code. If the button blinks twice then, your code is saved.  

Remote control codes for Panasonic Gadgets

Panasonic TV Codes

  • 1010
  • 1003
  • 1053
  • 1049
  • 1231
  • 1096
  • 1152
  • 1289
  • 1295
  • 1293
  • 1267
  • 1253

Panasonic HDTV Codes

  • 1169
  • 1140
  • 1170
  • 1234
  • 1194
  • 1233
  • 1442
  • 1417
  • 1410
  • 1336
  • 1331

 Panasonic Audio Codes

  • 4018
  • 4005
  • 4038
  • 4030
  • 4050
  • 4063
  • 4051

Panasonic DVD Codes

  • 2075
  • 2031
  • 2076
  • 2105
  • 2104
  • 2154
  • 2151
  • 2153
  • 2066