REPAIRING AND NOT THROWING AWAY

Richtige Fernseher haben Röhren!

Richtige Fernseher haben Röhren!

In Brief: On this site you will find pictures and technical information about Service Modes, Circuit Diagrams, Firmware Update procedure, Disassemble procedure, Universal remote control set-up codes, Troubleshooting and more....

If you go into the profession, you will obtain or have access to a variety of tech tips databases HERE IT IS Master Electronics Repair !.

These are an excellent investment where the saying: 'time-is-money' rules. However, to learn, you need to develop a general troubleshooting approach - a logical, methodical, method of narrowing down the problem. A tech tip database might suggest: 'Replace C536' for a particular symptom. This is good advice for a specific problem on one model. However, what you really want to understand is why C536 was the cause and how to pinpoint the culprit in general even if you don't have a service manual or schematic and your tech tip database doesn't have an entry for your sick TV or VCR.

While schematics are nice, you won't always have them or be able to justify the purchase for a one-of repair. Therefore, in many cases, some reverse engineering will be necessary. The time will be well spent since even if you don't see another instance of the same model in your entire lifetime, you will have learned something in the process that can be applied to other equipment problems.
As always, when you get stuck, checking out a tech-tips database may quickly identify your problem and solution.In that case, you can greatly simplify your troubleshooting or at least confirm a diagnosis before ordering parts.

Happy repairing!
Today, the West is headed for the abyss. For the ultimate fate of our disposable society is for that society itself to be disposed of. And this will happen sooner, rather than later.

How to use the site:

- If you landed here via any Search Engine, you will get what you searched for and you can search more using the search this blog feature provided by Google. You can visit more posts scrolling the left blog archive of all posts of the month/year,
or you can click on the main photo-page to start from the main page. Doing so it starts from the most recent post to the older post simple clicking on the Older Post button on the bottom of each page after reading , post after post.

You can even visit all posts, time to time, when reaching the bottom end of each page and click on the Older Post button.

- If you arrived here at the main page via bookmark you can visit all the site scrolling the left blog archive of all posts of the month/year pointing were you want , or more simple You can even visit all blog posts, from newer to older, clicking at the end of each bottom page on the Older Post button.
So you can see all the blog/site content surfing all pages in it.

- The search this blog feature provided by Google is a real search engine. If you're pointing particular things it will search IT for you; or you can place a brand name in the search query at your choice and visit all results page by page. It's useful since the content of the site is very large.

Note that if you don't find what you searched for, try it after a period of time; the site is a never ending job !

..............The bitterness of poor quality is remembered long after the sweetness of todays funny gadgets low price has faded from memory........ . . . . . .....
Don't forget the past, the end of the world is upon us! Pretty soon it will all turn to dust!

©2010, 2011, 2012, 2013, 2014 Frank Sharp - You do not have permission to copy photos and words from this blog, and any content may be never used it for auctions or commercial purposes, however feel free to post anything you see here with a courtesy link back, btw a link to the original post here , is mandatory.
All posts are presented here for informative, historical and educative purposes as applicable within fair use. NOTHING HERE IS FOR SALE !

Tuesday 23 April 2019

HOW TO REPAIR ELECTRONIC EQUIPMENT WITH BUTTON SWITCHES

How To Repair Electronic Equipment with Button Switches

  Introduction
These “critters”,  button switches,  are often used in our electronic equipment whenever there is a button designed to be pressed either to reset a program or to do the programming.

These buttons are cheap but they are often not lasting especially those in the cheaper electronics equipment such as door bells or some remote controls. One would need to press the buttons extra hard in order to sound the door bell or to activate the remote control.


Why?

There are 2 reasons:

1. The current that passes through the buttons is not enough to overcome the “dirt” building up at the contacting point. When the contacts of the button are making or breaking, there will be “sparks” no matter how small, these “sparks” will usually “blow” the dirt building up in the contacts.   If the current is too small,  the sparks created will not be able to "blow" off the "dirt".

2. The current that passes through the button is too strong, hence,  causing sparks to “eat away" the metal of the contact surface and therefore, building carbon resistance enough to prevent the passage of the current.


How to Repair?

First, remove the buttons carefully,  making sure the circuit board is not damaged, then

1. Replace the buttons

This is the best option.

2. Open up the button and then clean the contact. 

This will require some skills to break open the cover and then reseal it after cleaning. Not often successful

3. Pass a small current through the button using a torchlight battery with as many pulsation clicks as possible  (i.e to click the button switch as quickly as possible, say 20 clicks) until the ohms meter measurement across the button switch shows consistent low resistance readings. Do not leave the button switch  close for too long as this will short-circuit the battery.

Method 3 may not necessary work when the contacts of the buttons are completely charred and worn. In that case, the only workable solution is to replace the button switch.   However,  method 3 may be a quick method as it could be done "in circuit"  when one can isolate the switch from the circuit. In the case that one torchlight battery cannot do the job and the button switch came back with the same problem,  try maximum 2 nos of batteries working in series.

MiTV4 HOW TO SET THE DEFAULT INPUT FOR HDMI PORTS?

    How to Set the Default Input for HDMI Ports ?


    # MiTV4, Xiaomi TV,  Set default Windows,  HDMI ports
     
    MiTV4 has 3 HDMI ports and 2 USB ports for TV's input connection.  One of the HDMI port has Audio Return Channel (ARC) for direct connection to sound bars that has HDMI ARC.  Some  users have problem finding the control to set the input port so that the port will be selected and turned automatically with the TV.

    If you have difficulty finding the controls,  just follow these steps:

    Description
    Action
    Remark
    (click to enlarge picture)
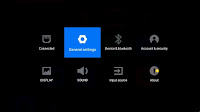
    1.  Navigate to [My Apps]
    After entering into [My App],  select the [Setting] icon


    https://2.bp.blogspot.com/-igTXiddMY_0/XLCyF9L2ZeI/AAAAAAAAEAY/JD1UubE_Mn822RYIbY0XZjJ_8RHzGmKFgCLcBGAs/s1600/2019-04-12_23h22_44.jpg
    2.  In the setting manual
    Select [General Setting]


    https://4.bp.blogspot.com/-PS6Qx7dviK8/XLCyTIxguiI/AAAAAAAAEAc/DohhcbobWD0dP9F_-439F0caBrUJjpjNgCLcBGAs/s1600/2019-04-12_23h28_20.jpg
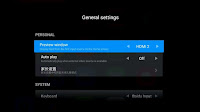
    3.  In the  General Setting menu
    Select [Preview Window] and click the selection box to select the correct input 


    https://4.bp.blogspot.com/-3IbiwlixxW8/XLCybo4MX2I/AAAAAAAAEAg/_eyf2IUqw5cceQJOm06GsAyj-GY1PRHmACLcBGAs/s1600/2019-04-12_23h30_18.jpg
    4.  Back to the main menu
    Check that the correct input is select and show in the [Preview Windows]


    https://2.bp.blogspot.com/-BXGILUIoCxI/XLCyji7pKTI/AAAAAAAAEAo/UhiGRCHA8X4ZeR9MaNYBYwZdUVqAsEtZQCLcBGAs/s1600/2019-04-12_23h27_16.jpg

SPEED UP MOZILLA FIREFOX AND ITS VIDEO PERFORMANCE


    Speed up Firefox and its Video Performance


    Firefox is one of the very popular browsers.   Unfortunately,  it has set its browser performance for common notebook and PCs that usually have lower end CPU and  limited RAM capacity.   Nowadays,  many users have upgraded their notebook and PCs.  Faster notebook and PCs with bigger RAM capacity  is now a norm rather than an exception.  There is a need to release the power of Firefox for better performance.  This article will cover 2 improvements that will make Firefox run faster with better video performance. 

    What are these 2 Improvements ?

    1.  Making use of excessive RAMs to improve the speed and response;
    2.  Making Firefox spending lesser time saving and storing its WebPages;  thus, improving the  response and video performance.

    How?

    Step by Step
    Action
    Click picture to enlarge
    I)  Improve Firefox's Speed and response


    1.  Opening up Firefox configuration panel
    Type [about:config]  in the url box.  In the next screen click [I accept the risk]

    2.  Search for keywords
    Type [browser.cache.disk]  in the Search box and change the value of the item from [True]  to [False]

    3. Search for keywords
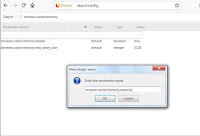
    Type  [browser.cache.memory] in Search box
    Check that   [memory.enable] is set to [True]

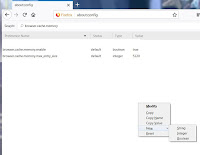
    4.  Add new Preference Name
    Right click mouse and select [New], Enter in the box [Integer].  In the [Preference Name box]  enter [browser.cache.memory.capacity] as shown.  After that change [0] to [<-1><-1>-1] which will allow PC to manage the memory capacity
    https://lh3.googleusercontent.com/-4Coyv6zG4d0/W8tMJgSzHYI/AAAAAAAADWQ/mp4_HVioVvgnBvh4bu0qzlo2o_RDuS23wCEwYBhgL/w140-h108-p/2018-10-20_23h03_27.jpg


    https://4.bp.blogspot.com/-yxXc8utcSIo/W8tMVDq0HuI/AAAAAAAADWU/GfzeSlEolYMYqirMstNc7WG4VNl8g53DQCPcBGAYYCw/s1600/2018-10-20_23h06_51.jpg


    II)  Improve Video Performance


    1.  Search for keywords
    Type [(browser.sessionstore.interval] in the search box and change Value from [<15000>15000] <15000> to [60000] to allow more time to save and store Webpages.   If needed be,  use [100000] if one does not have more webpages opened at the same time.<60000><60000>

    Results

     1.  There is no test program or apps available to test the speed and response of the browser but one can notice that Firefox will open up the Google panel much faster !

SMART TV BLUETOOTH HEADPHONE CONNECTIONS

Smart TV Bluetooth Headphone Connections


Smart TV uses BLE Bluetooth Technology that will allow the TV to be connected to the  Bluetooth remote,  mouse,  keyboard,  headphones,  soundbar and other various bluetooth devices.    However,  many TV users have difficulties connecting up their Bluetooth handphones.  This article intends to explain why.

What is BLE?


BLE stands for Bluetooth Low Energy.  Many operating systems including iOS, Android, Windows Phone as well as macOS, Linux, Windows 8 and Windows 10 support BLE.  However,  BLE technology is not backward compatible; hence,  older Bluetooth devices might not work in BLE system.

How Many Devices Can Be Connected at the same time?


As many as 2 billion devices can be connected and operate at the same time;  however,  most design and operating system  will allow only up to 7 devices.


Connecting Headphone to Xiaomi TVs


Step by Step

Click on picture to enlarge
1.  Enter Setup,  one would be greeted with this screen.  Then select Device & Bluetooth

2.  In the next screen,  select Discover Bluetooth Devices.  Check if the Bluetooth headphone is in the list

3.  If it is not in the list,  try to turn on the Bluetooth headphone by pressing and hold  the on/off button for about few second until the light starts to blink.  Connection will be establish as soon as the light turns green

4.  Now one should find the Bluetooth headphone appear on the TV screen.  In this case, “SPORT-S9”


Why my Bluetooth Cannot Connect?


There are many reasons


1)  The TV does not have Bluetooth operating system.   

The cheaper TV often use infra-red remote device instead of Bluetooth operating system.


2)   The Bluetooth Headphone is not BLE type


3)   Faulty Bluetooth devices

What is the Other Alternative? 

There are always other alternatives.  One of the cost effective way is to buy a Bluetooth receiver and use that receiver to pair with the TV so that one can use any ordinary headphone to listen to the TV's audio sound.  The most common one that work well with Xiaomi TV is its own Xiaomi Wireless Audio Receiver.


Other receiver should also work.   Although Bluetooth standards are always backward compatible,  it is preferable to get receivers that are using the same Bluetooth standard as the TVs;  in the case of MiTV,  it is Bluetooth 4.2.

What if my TV does not have Bluetooth?


One can buy separately a Bluetooth converter that will convert sound signal from 3.5 mm RCA jack to transmit Bluetooth signal.   There are several types in the market.   Many are receiver type that would not work.   Buy only those that has a transmitter.  Some came with transmitter and receiver in one unit.  Note that most Xiaomi TV do not have RCA jack for audio output;  in this case,  one would have to select a transmitter that has a co-axial SPDIF input or buy separately a co-axial SPDIF to RCA jack converter.


HOW TO PROPERLY CLEAN AIR CONDITIONING EVAPORATOR UNIT

    How to Clean Air Conditioning Evaporator Unit Properly


    There are a lot of articles written about how to clean air conditioning evaporator units.   Many advised  to use chemical foam;  some preferred to use the cleaning chemicals specially blended for air conditioning washing.   There are merits and demerits depending on how each method can remove the “dirt”.  This article will describe a method that will thoroughly clean the air conditioning evaporator. 

    Where is this Evaporating Coil located?

    The coil is always located indoors for split unit air conditioners.  It is always hidden inside the air grille box or cover and always behind the air filter as shown


    When to do Chemical Cleaning?

    The air conditioning unit will tell us with the following telltale signs:-

    1)  The air conditioner is no longer as cold and;
    2)  The fan speed needs to be turned high before one can feel any cold air blowing,  plus
    3)  The air conditioner is making a louder air splashing noise and lastly;
    4)  The compressor will turn off sooner before the set room temperature is reached (only for air conditioning unit that has anti-freezing control for the evaporating coil)

    Why Compressor Cuts Off Sooner?

    The air conditioner that has anti-freezing control will have  a thermal sensor attached to the returning refrigeration pipe.  If the coil is dirty,  the evaporator coil temperature will get lower and will eventually freeze up unless the temperature change is picked up by this thermal sensor which will automatically cut off the compressor operation.

    What are the Traditional Methods?

    a)  Foam Cleaning 

    One would spray foam onto the coil and wait for about 10 to 15 minutes for the foam to work its way into the coil. After that, spray washing the coil with clean water or just leave for the condensate water to "drain"  the foam into the outlet drain.   This method is fast but does not allow the fan blades to be cleaned


    b)  Chemical Spraying

    One would just spray the chemical onto the coil and wait for about 10 to 15 minutes for the chemical to work into the coil,  then spray washing the chemical.  This method can be used to clean the fan blades.


    Both methods are fast but they are not cleaning the coil thoroughly.  For proper cleaning,  one should clean the air condition evaporator unit  using “Chemical Bathing” method which is recommended to be done at least once every 10 years.

    What is Chemical Bathing Method?

    It is a cleaning method that pours chemical water over the coil to clean the coil thoroughly.  This method will involve some dismantling including the draining tray if one wants to conserve the chemical water for repeated cleaning;   otherwise,  one could just let chemical water drain out into the outlet drain.     

    Preparation: 

     Besides having the necessary things such as a ladder,  paint or cleaning brushes,  cleaning rags and other preparation work such as switching off power supply etc,  one should have the following

    Description
    Action
    Remark
    (Double-click to enlarge)
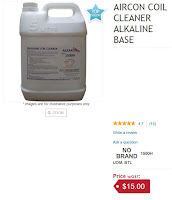
    1.   Chemical Cleaning Fluid
    Available easily from Horme Store or any air conditioning hardware stores @ about SGD$15/= per 5 litres or gallon
    https://1.bp.blogspot.com/-o805hbsTlZc/XBpxSS8kjRI/AAAAAAAADqo/TF53S3SbzvwmRY1FFS7444tz-KP8B_pLwCLcBGAs/s1600/2018-12-19_19h30_05.jpg
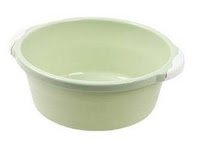
    2.  Plastic basin

    https://3.bp.blogspot.com/-1VSM9OxY-eQ/XBpxvFV7_LI/AAAAAAAADqw/lqO3rVSiDpQO9CYdqZlvH9E9ttZ7HSu9QCLcBGAs/s1600/2018-12-19_19h35_22.jpg
    3.  Plastic tumbler or mug

    https://1.bp.blogspot.com/-5Xb5UjDrkYA/XBpx6n8B5aI/AAAAAAAADq0/VgzgJYlALOE9PUumIQcCji8BBuHTOj_xACLcBGAs/s1600/2018-12-19_19h39_42.jpg
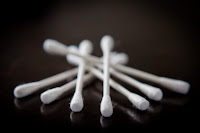
    4.  Cotton buds

    https://1.bp.blogspot.com/-Grbe5YHENXQ/XBpyGoUe_nI/AAAAAAAADq8/pasGZU0uHiUEHuvIIrDttfY_6PLWPkhwwCLcBGAs/s1600/2018-12-19_19h42_40.jpg
    5.  Hand Gloves

    To prevent hand and fingers from prolonged soaking in the chemical water

    Step by Step 

    using Panasonic Inverter Air Conditioner as an example

    Description
    Action
    Remark
    (Double-click to enlarge)
    1.   Preparation work
    1.  Switch off the power as safety precaution
    2.  Remove the filter if necessary 3.  To make the chemical water,  mix one cup of chemical with about 5 cups of clean water in the plastic basic

    2.  Dismantling the air grille cover
    1.  Remove the plastic caps that covered up the 2 screws and remove the screws as shown;
    2.  Lift to open the horizontal air vane to clear the grille cover;
    3.  Hold both sides of the grille cover and pull it forward toward yourself
    4.  If the cover could not be dislocated and removed easily,  try releasing the 3 plastic catch that holds the top of the grille cover as shown


    https://2.bp.blogspot.com/-WI2kO7LOaZI/XBpydIo9R2I/AAAAAAAADrE/n7Tdkp0o2JkJzVkLozVMH_ftamE8RCfiACLcBGAs/s1600/2018-12-19_21h38_04.jpg
    https://4.bp.blogspot.com/-W7ewtluVLf0/XBpyqvgATXI/AAAAAAAADrI/ZwPlpfXUc_Qo0XRhOcti5Sfu40ehTIMuQCLcBGAs/s1600/2018-12-19_22h53_59.jpg
    3.  Dismantling the draining tray
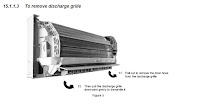
    The draining tray and the air discharge grille is one complete unit. To dismantle
    1.  Pull the air discharge grille downward to loosen  the tray unit from its seats
    2.  Remove the drain hose that is connected to the draining tray
    https://3.bp.blogspot.com/-Nxby13QXqBA/XBpzPISBUkI/AAAAAAAADrU/I0S0k8J6aecRNpi2sXOrzLevVoLtZ-yEACLcBGAs/s1600/2018-12-19_21h38_42.jpg


    4.   Coil Surface Cleaning

    1. Dip paint brush in chemical water and brush the fins in the same direction as and along the fins;
    2.  Collect the chemical water at the bottom of the coil using the basin
    3.  Repeat action until the fins are all cleaned and shining on the surface. 

    5.  Doing Chemical Bath
    1.  Use the plastic mug to pour the chemical water from the top of the coil and collect the water at the bottom of the coil using the basin
    2.  Repeat for the rest of the fin and coil;  
    Note:  A air or water pressure pump would be helpful to push the chemical water through the fins but it is not really necessary unless the coil is so stuck with dirt that cannot be cleaned by pouring water over the fins
    6.  Water Rinsing
    1.  Repeat step 5 but using clean water instead of chemical water
    2.  Change the water as and when necessary for proper cleaning
    The chemical water needs to be rinsed "thoroughly" so that it will not be left to “attack” the flimsy fins
    7.   Fan Blade Cleaning
    1.  Dip the cotton bud in chemical water and clean the blade leaf by leaf and blade by blade until all the dirt are removed Note:  One could use chemical spray to soften the dirt before removing them either using water and follow up the cleaning by using cotton buds.
    https://1.bp.blogspot.com/-iaWjrp-ONyw/XBp1KBT9ZeI/AAAAAAAADrk/lAdfdqTwJ9MT8VzoxjK9fr3zZXQWi-6vgCLcBGAs/s1600/2018-12-19_22h30_30.jpg
    Important:  Never apply any pressure to the blade as a bend in the fan blade will put the wheel off balance,  creating unnecessary noises and vibrations during operation 
    The alternative is to dismantle the cross flow fan by removing the screw as shown above and removing the fan bearing on the other end.  It would be necessary to dismantle the control board and also dislocate and lift up the evaporator to provide space to remove the cross flow fan.

    8.  Completion and Assembly
    1.  Reverse the dismantling procedure to fit all components back in place
    2.  Switch on the air conditioner after placing a piece of cloth or plastic to catch the  dirt “flying” out from the fan blades.
    If the coil has been properly cleaned,  one should notice that the air conditioner’s compressor will never stop operating until the set room temperature has been reached.

    Result

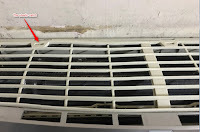
    Unfortunately,   there was no picture capturing the result of the cleaning but this picture did show up the shine of the lower part of the coil under the ceiling light.   The picture was intended to show the temporary shelve put up to ease the cleaning operation of the fan blade.