SONY KDL40S2000 - KDL32S2000 - SERVICE ADJUSTMENTS - SERVICE MODE - DETAILS

To adjust various set features, use the Remote Commander to put the set into service mode to display the service menus. The Remote Commander displays the service menu associated with the Digital or Analog format depending on which format is on the TV when you enter service mode.
ACCESSING THE DIGITAL SERVICE ADJUSTMENT MENUS
- Turn the TV on and view a Digital channel.
- Put the TV in standby mode. (Power off).
The Digital service menu displays.
- Use the [DN] button to view the next category listing the white balance adjustment items.
- Use the [DN] or [UP] button to select the item you want adjust.
- To increase the data value of the category, press the button.
- To decrease the data value of the category, press the button.
To save the data value changes:
- Press the [DN] button to select Color Save and then press the (+) button.
- To save the data value changes, select Save by pressing the [DN] button and then press the (+) button.
- To cancel the data value changes, select Cancel by pressing the [DN] button and then pressing the (+) button.


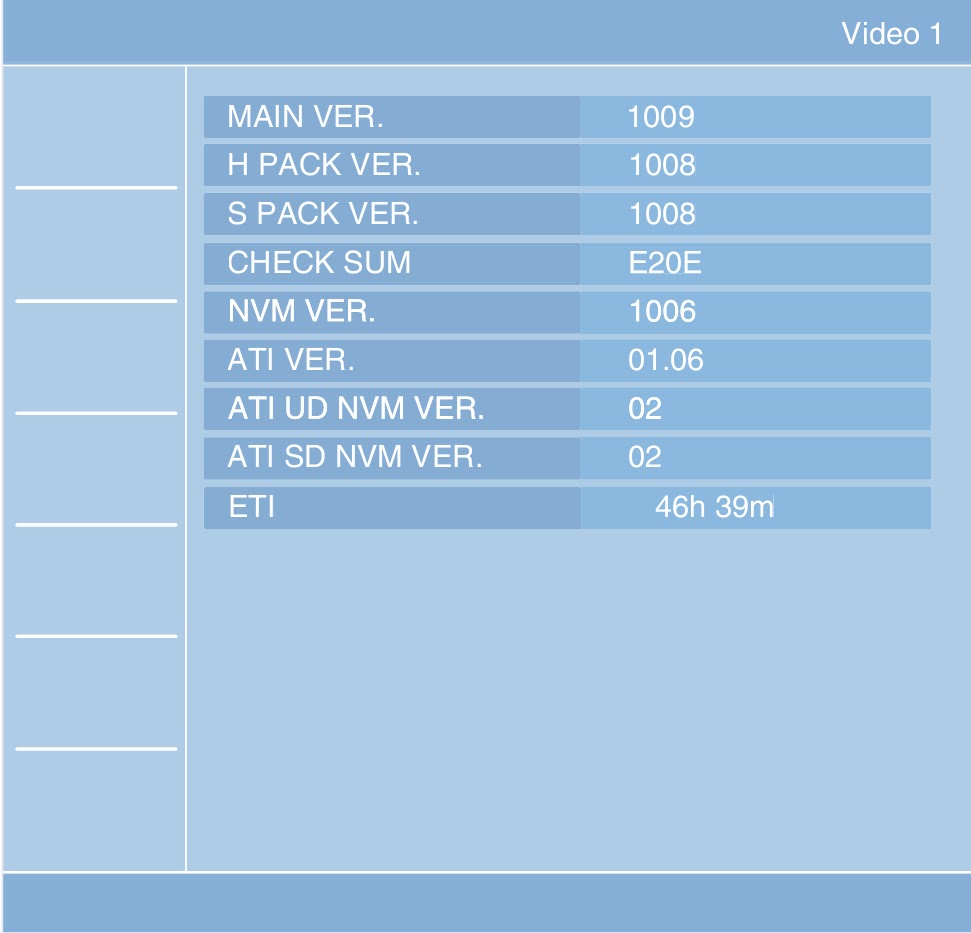
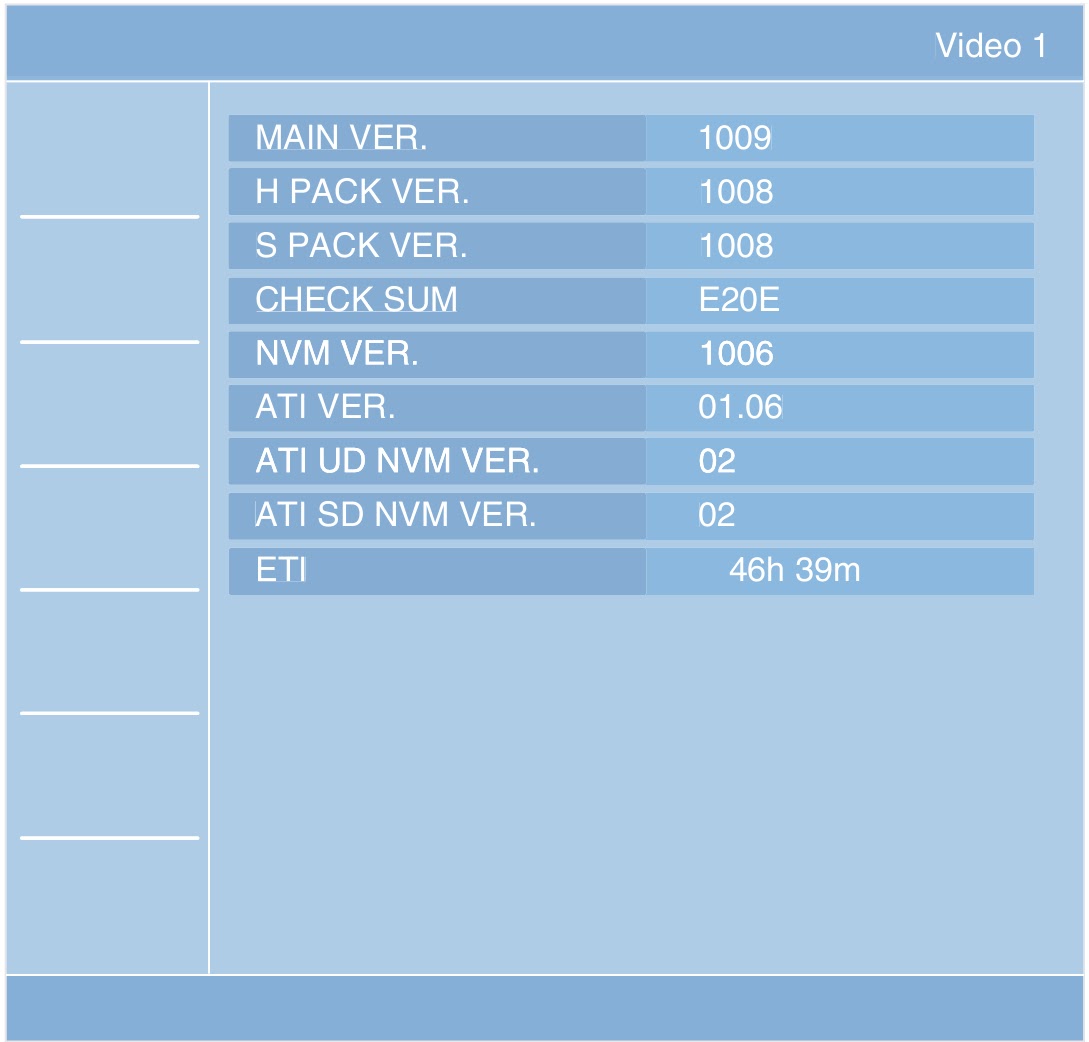
VIEWING THE DIGITAL MODULE BOX (Q-BOX) SERVICE ITEMS
- Turn the TV on and view a Digital channel.
- Put the TV in standby mode. (Power off).
- Press the following buttons on the Remote Commander within a second: [DISPLAY à CHANNEL-5 à VOLUME + à POWER ON]

- To display the Digital Module (Q Box) service adjustment menus, press [JUMP]
The QM category displays

- To change the category, press [2] or [5] on the Remote Commander. Note: Pressing [2] or [5] only changes the categories within the service menu displayed. To return to the Digital Service Menu, press the [JUMP] button.
- To change the adjustment item, press [1] or [4] on the Remote Commander.
- To change the data value, press [3] or [6] on the Remote Commander. Note: To go back to the last saved data value, press [0] then [ENTER] on the Remote Commander to read the memory.
- To write into memory, press [MUTING] then [ENT] on the Remote Commander.
- To exit service mode, turn the power off.
ACCESSING THE ANALOG SERVICE ADJUSTMENT MENUS
- Turn the TV on and view an Analog channel.
- Put the TV in standby mode. (Power off).
- Press the following buttons on the Remote Commander within a second: [DISPLAY à CHANNEL-5 à VOLUME + à POWER ON]

- Use the [DN] button to view the next category listing the white balance adjustment items.
- Use the [UP or [DN] button to select the item you want adjust.
- To increase the data value, press the [à] button.
- To decrease the data value of the category, press the [ß] button.
- To save the data value changes, press the [DN] button to select Color Save and then press the [+] button.
- To save the data value change, select Save by pressing the [DN] button and then press the [+] button.
- To cancel the data value change, select Cancel by pressing the [UP] button and then pressing the [+] button.
RESETTING THE USER MENU-FACTORY RESET
Put the TV in standby mode. (Power off).
Press the following buttons on the Remote Commander within a
second: [DISPLAY à
CHANNEL-5 à
VOLUME + à
POWER ON]
The service menu displays.

- Use the [DN] button to view the next category listing the white balance adjustment items.
- Continue pressing the [DN] button until the next category list displays.

- Press the [+] button to select TEST RESET options.
- Press the [DN] button to select OK.
- Press the [+] button to reset the TV.
AGING MODE
Aging mode is designed to remove image retention from the
screen.
NOTE: Once you enter into Aging Mode the Remote Commander no
longer functions with the set. To turn off the set, push the Power Button on
the set.
- Put the TV in standby mode. (Power off).
- Press the following buttons on the Remote Commander within a second: [DISPLAY à CHANNEL-5 à VOLUME + à POWER ON]
- Use the [DN] button to view the next category listing the white balance adjustment items.
- Continue pressing the [DN] button until the next category list displays
- Press the [DN] button to select AGING MODE.
- Press the [+] button to display the Aging Mode options.
- Press the [à] button to select ON.
- Press the [+] button to start the aging process.


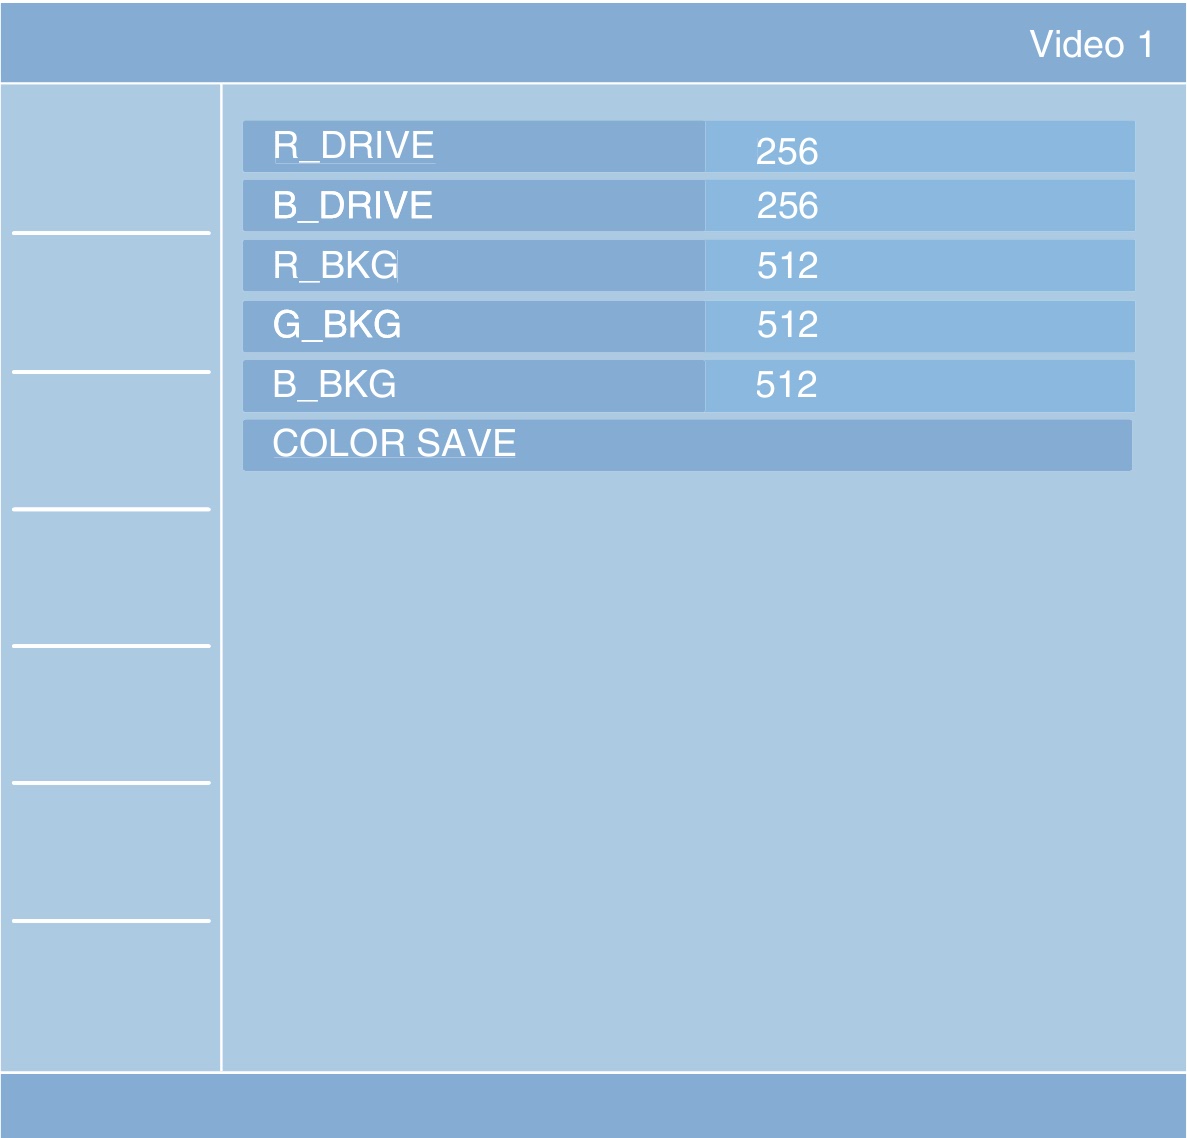
WHITE BALANCE ADJUSTMENT
The White Balance only needs to be adjusted when you replace
the BU Board.
Through the Video 1 input, step Gray Scale with Setup.
The User Menu displays
- Press MENU on the Remote Commander.
- Press the [à] button until Settings is selected, then press the [+] button.
- From the Picture menu, press the [à] button to display the picture mode options.
- Press the [DN] button to select Custom, the press the [+] button.
- From the Picture menu, press the [DN] button to select Color Temperature.
- Press the [DN] button to display the Color Temperature options.
- Press the [DN] button to select Cool, then press the [+] button.
- From the Picture menu, press the [DN] button to select Advanced Setting.


- Using the arrow keys set all registers in the Advanced Setting menu to Off.

- Put the TV in standby mode. (Power off).
- Access the Service Menu by pressing the following buttons on the Remote Commander within a second: [DISPLAY à CHANNEL-5 à VOLUME + à POWER ON]
The Digital service menu displays.
- Press the [DN] button to display the white balance adjustment menu items.
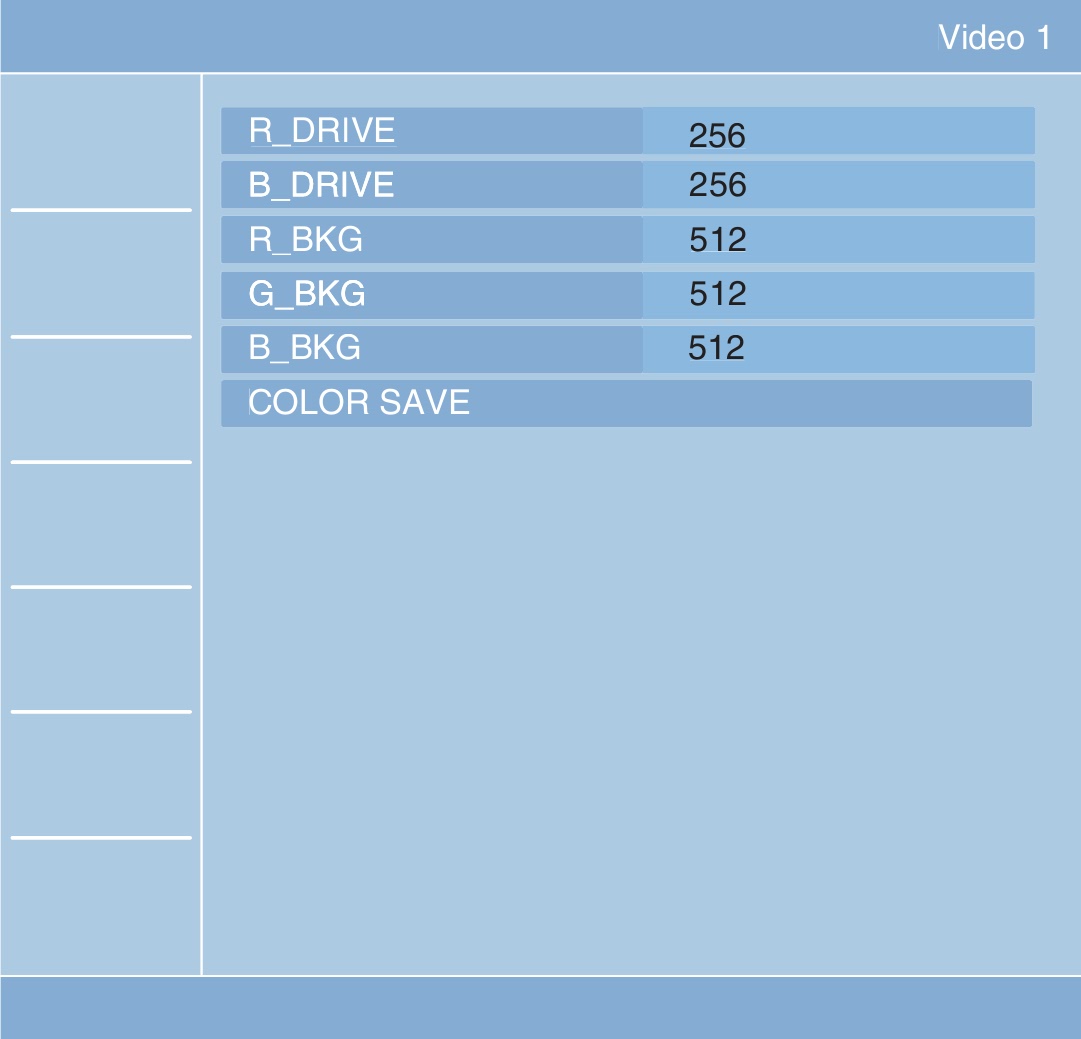
- Using 10 step NTSC Gray Scale with Setup adjust the White Balance of the 60% shade with R_DRIVE and B_DRIVE.
- Using the same pattern, adjust the white balance 20% with R_BKG and B_BKG
- 20 IRE and 60 IRE shades should have the same color.
