PIONEER VSX-821-K - VSX-921-K - VSX-521-K - AUDIO/VIDEO MULTI-CHANNEL RECEIVER - SERVICE MODE & DETAILS

The numbers of detection for various protection processes are displayed.
TO ENTER & EXIT
- During Standby mode, simultaneously press and hold the [PRESET –] and [STANDBY/ON] keys for 2 seconds to enter this mode.
- The display will return to the normal indication when no key operation is performed for 5 seconds.
BASIC OPERATIONS
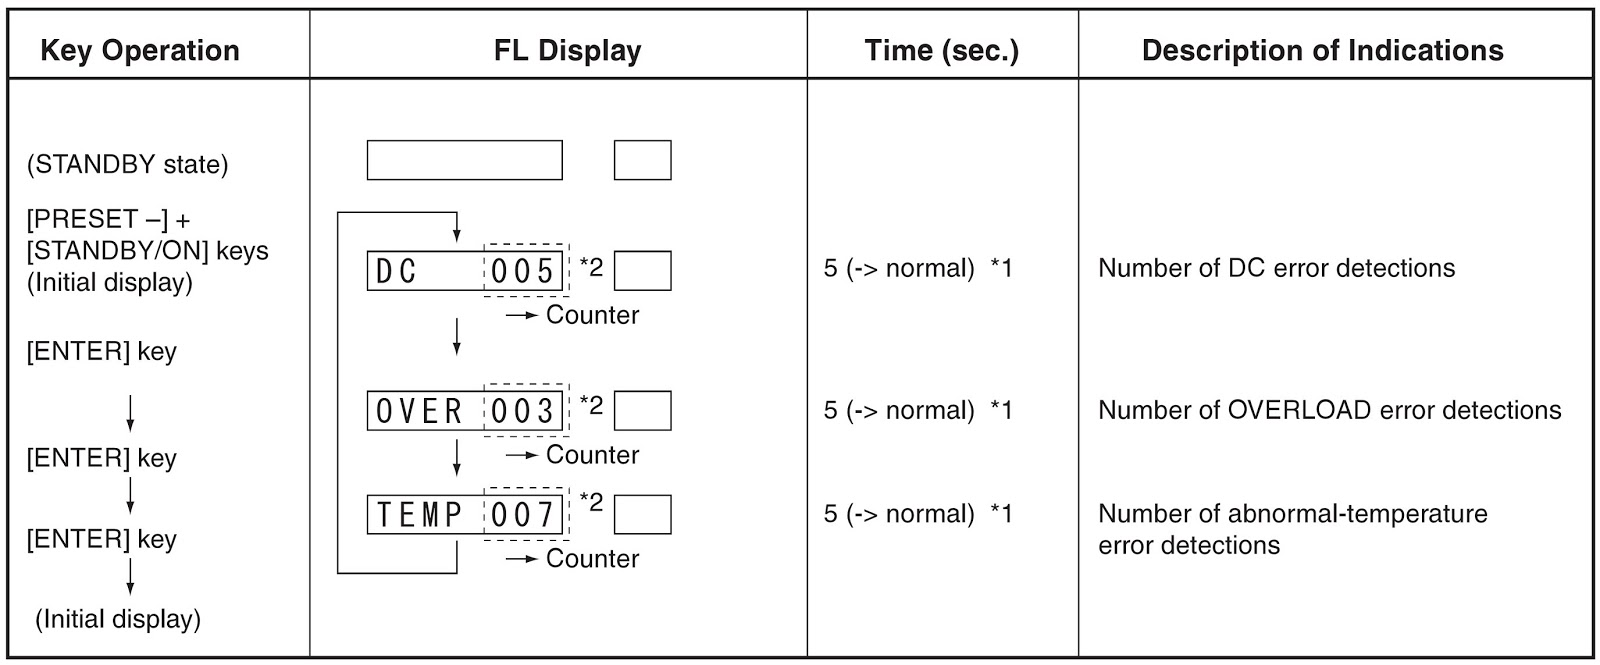
#1 "5 (-> normal)" denotes that the display
will return to the normal indication when no key operation is performed for 5 seconds.
#2 Variable range: 0 to 255.
- The above-mentioned Display mode is available only when the product operates properly.
- If any protection function is activated while the product is in use, the product cannot be turned ON and enter the above Display mode. In such a case, cancel the protection function, referring to “3.4 How to cancel the status after detection of the DC error." If a protection function is activated immediately after the previous protection function is canceled, cancel that protection function again then enter STBY mode immediately. You can then see the error logs, following the above procedures, until a next protection function is activated.
TO ENTER & EXIT
- During Standby mode, simultaneously press and hold the [ALC/STANDARD SURR] and [STANDBY/ON] keys for 10 seconds to enter this mode.
- The display will return to the normal indication when no key operation is performed for 5 seconds.
BASIC OPERATIONS

#1 "5 (-> normal)" denotes that the display
will return to the normal indication when no key operation is performed for 5
seconds.
#2 Indication when the BD function is selected.
Detailed Explanations
- When the procedures for Reset mode for numbers of protection detections are completed, all the counters will be reset to "000."
- Prohibitions:
- The protection detection counts cannot be cleared (reset to 000) with the MEMORY CLEAR process.
- They can only be cleared when the procedures of Reset mode are completed.
THE UNIT'S OPERATION WHEN AN ERROR IS DETECTED
- The unit’s operation when a DC/OVER/TEMP error is detected is described here.
- How to cancel the status after detection of a DC error is described here, because no key input will be accepted after a DC error detection.
BASIC OPERATIONS

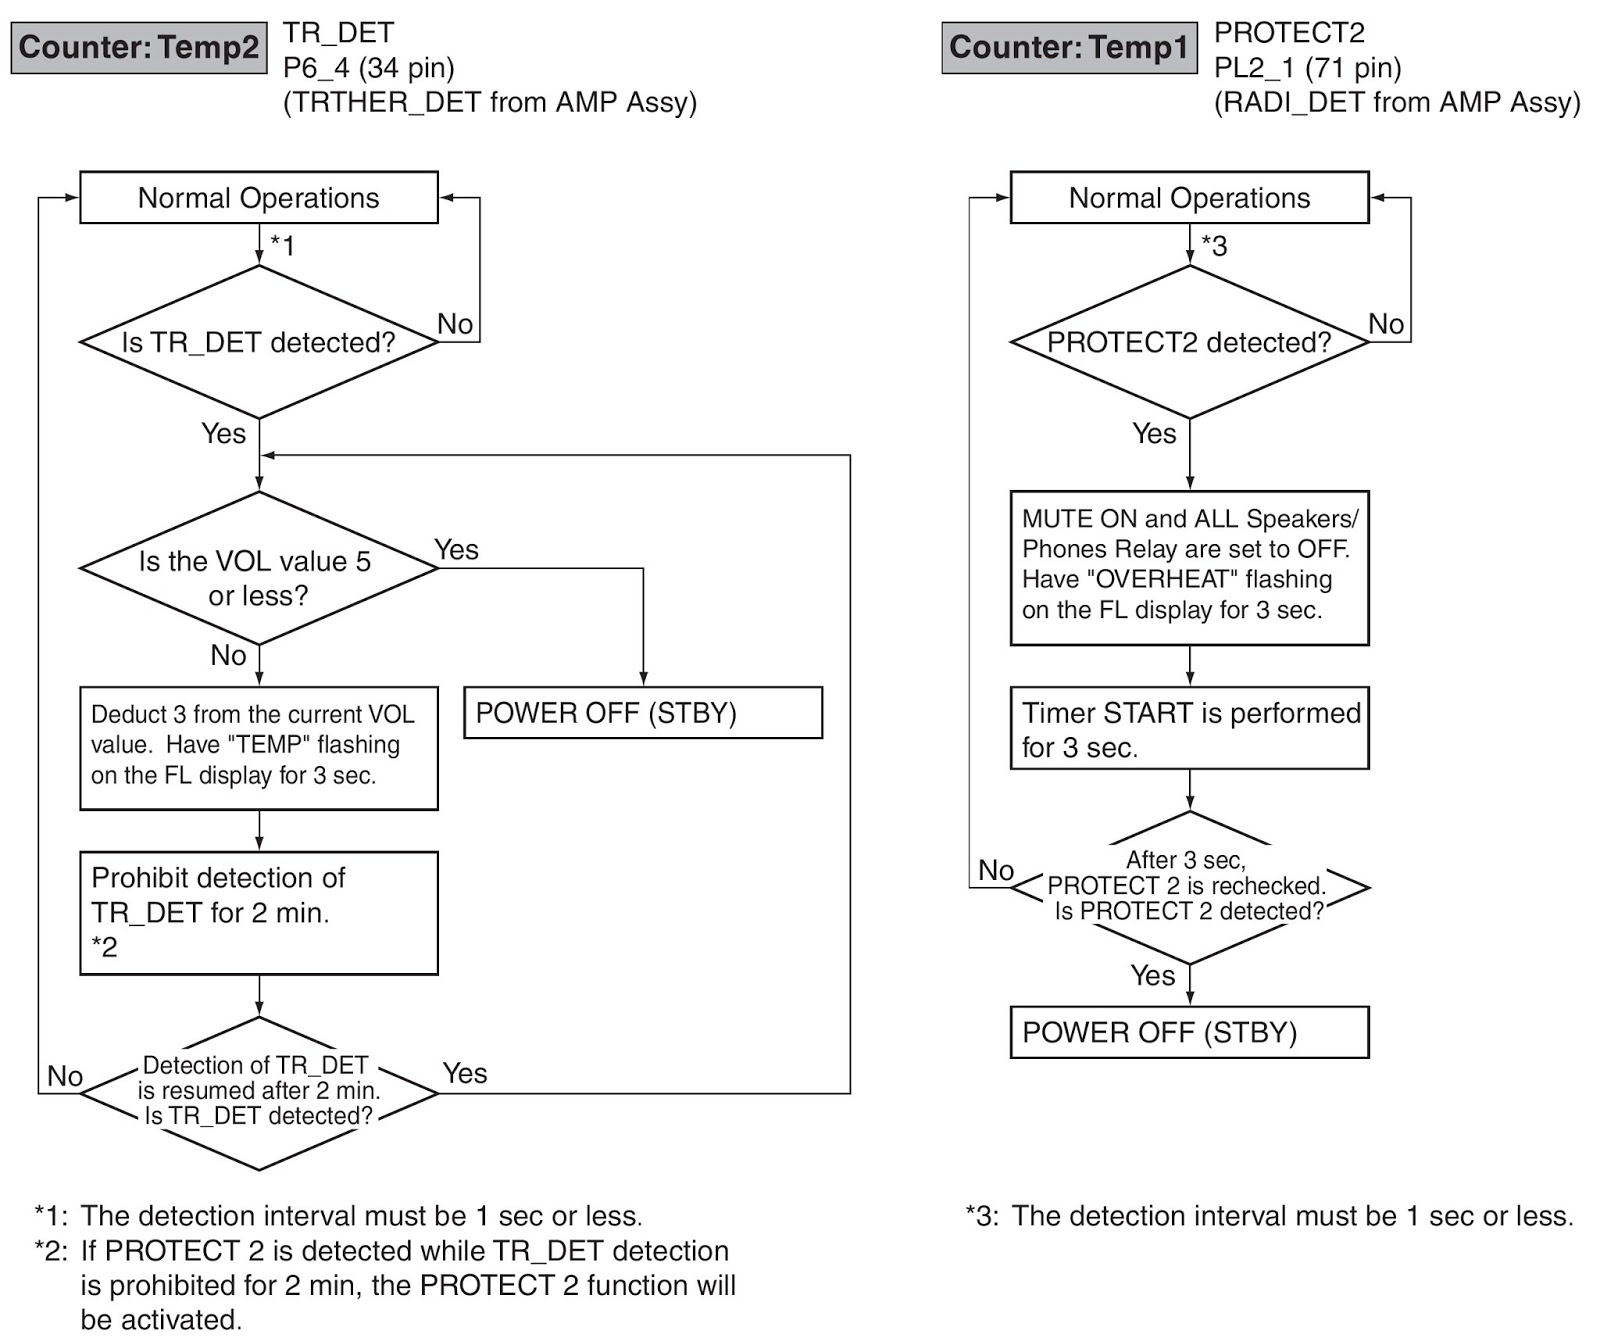
TEMPERATURE [OVERHEAT] ERROR DETECTION
- For detection of a TEMP error, the unit monitors both the TR_DET and PROTECT2 signals. If a TEMP error is detected, the processes shown below will be performed. The processes shown below are rough operational specifications and are not the actual commands from the mounted components. After a TEMP error is detected, the count of protection activation detections will be updated.
TO CANCEL THE STATUS AFTER DETECTION OF THE DC ERROR

Explanations
Simultaneously holding the [ADVANCD SURROUND] and
[STANDBY/ON] keys on the front panel pressed for 2 seconds will cancel Key
Input Inhibition mode after a DC error detection and turn the unit ON.
{Click on images to Magnify}