BREMSHEY-SPORT_ORBIT ELLIPTICAL TRAINER _ REPAIR HELP

CHANGING REAR DRUM BRACE ASSEMBLY FRAME BEARING.
- Place a long drift through the center hole of one bearing so that it rests against the inner side of the opposite bearing.
- Tap the end of the drift with a hammer until the one bearing is removed.
- Repeat the removal process with the other side. Be careful to remove the bush which separates the 2 bearings.
- To re-fit new bearings push one bearing into the frame housing and tap lightly with a soft faced hammer until the face of the bearing is flush with the top of the frame. Great care should be taken not to damage the bearing.
- Replace the separating bush and then re-fit second bearing as above.
REAR DRUM COVERS
- The covers are identical except that the speed sensor is mounted within the left-hand unit, which is the drive belt side. If the drive side unit is worn or cracked the items can be exchanged providing that the speed sensor magnet is relocated.
NOISES PRODUCED BY READ DRUM COVERS
- Each cover is secured to the cross frame units by 8 screws if one or several of the mounting posts are damaged this can produce a ‘creaking’ noise under pressure. Also, this can lead to external cracks in the drum cover faces. A further service point can be to separate the drums from the cross frame and lubricate every contact point with grease.
RESISTANCE FLYWHEEL ASS'Y
The resistance flywheel rotates on a
fixed axle using 2 sealed bearings held in place by an internal circlip on the
drive belt side and a nylok nut on the other. If the bearings fail this will
result in a ‘rumbling’ noise. It may be necessary to isolate the flywheel by
detaching the drive belt. To replace the bearings:
- Remove the foot-tubes, covers, drive belt & vertical tensioning bar using previously outlined procedures. In some models it may also be necessary to remove the rear drum & brace assembly or the as floating tension arm as outlined previously.
- Slacken off the nylok nut on the non drive belt side of the flywheel axle by around 2 turns. To remove any friction, lightly tap the end of the axle with a soft faced hammer.
- Remove the internal circlip from the centre of the flywheel assembly.
- From the drive belt side, slide the flywheel off of the axle.


REPLACING FLYWHEEL BEARING
- Place a long drift through the centre hole of one bearing so that it rests against the inner side of the opposite bearing.
- Tap the end of the drift with a hammer until the one bearing is removed.
- Repeat the removal process with the other side.
- To re-fit new bearings push one bearing into the bearing housing and tap lightly with a soft faced hammer until the face of the bearing is flush with the top of the flywheel face. Great care should be taken not to damage the bearing.
- Re-fit second bearing as above.


BEARINGS & JOINTS
The linkages between the swing arm, foot-tube
and rear brace involve 3 main joints and bearings. These are often a source of
noise or unsmooth operation and therefore attention is often required.
SWING ARM JOINT
The swing arms are mounted on to the handle bar
axles and locked in place by a nylock nut supported by 2 washers. Inside each
swing arm joint there is a combination of a sealed bearing and sinter bearing.
It is very important that these areas are well lubricated with grease and this
should be carried out as a part of a general service. The bearings are very
seldom a problem and replacement is rarely required.
LOWER SWING ARM TO FOOT-TUBE JOINT
The 2 components are connected via an
axle through the lower swing arm which has sinter bearing bushes inside. The
axle is secured by 2 nylok nuts and supporting washers. It is very important
that these areas are well lubricated with grease and this should be carried out
as a part of a general service. The joint must be isolated to check its
performance by either detaching the lower swing arm tube from the upper or
detaching the foot-tube from the rear drum.
It is important that the combination of components is correctly
assembled and adjusted. The inner nut
of the pair should be fully tightened first. Then the outer nut should be
tightened so that the joint is correctly adjusted. There should be sufficient
rotation of the joint allowed without ‘pinching’ or lateral movement.

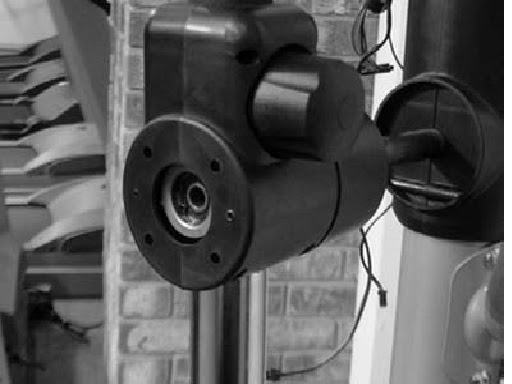
FOOT-TUBE TO REAR DRUM BRACE JOINT
The foot-tube is connected to the
rear drum brace via the axle stub. Inside the foot-tube joint is a sealed
self-aligning bearing held in place by an internal circlip. Either side of the bearing are 2 differently
sized bushes. The components are secured in place by a nylok nut and washer.
The self-aligning bearings rarely require attention but if required removing
the circlip and carefully tapping out the bearing can make removal, replace
with a reverse procedure. When re-assembled the nylok nut must be fully
tightened. If there is any lateral play between the joint and the rear drum
brace axle this may be due to play occurring within the area between each bush and the self-aligning bearing. To correct
this it may be necessary to replace either or both of the bushes or use shimming
washers to reduce the space.
