 EPIC VIEW 550 TREADMILL TROUBLE SHOOTING – WAKING BELT SLIPPING – NO POWER
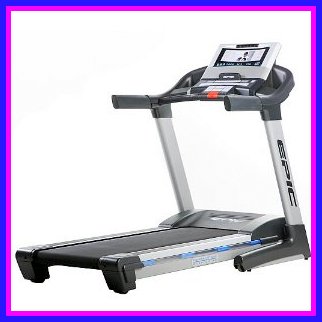
EPIC VIEW 550
TREADMILL TROUBLE SHOOTING
TROUBLESHOOTING
1. NO POWER
SOLUTION:
SOLUTION:
a. Make sure that the power cord is plugged into a surge
suppressor, and that the surge suppressor is plugged into a properly grounded outlet. Use only a single-outlet surge
suppressor that meets all of the specifications. IMPORTANT: The treadmill is
not compatible with GFCI-equipped outlets.
b. After the power cord has been plugged in, make sure that the key is inserted into the console.
c. Check the power switch located on the treadmill frame near the power cord. If the switch protrudes as shown, the switch has tripped. To reset the switch, wait for five minutes and then press the switch back in.
2. POWER FAILS DURING USAGE
SOLUTION:
SOLUTION:
a.Check the power switch (see the drawing above). If the
switch has tripped, wait for five minutes and then press the switch back in.
b. Make sure that the power cord is plugged in. If the power cord is plugged in, unplug it, wait for five minutes, and then plug it back in.
c. Remove the key from the console. Reinsert the key into the console.
d. If the treadmill still will not run, please see the front cover of this manual.
b. Make sure that the power cord is plugged in. If the power cord is plugged in, unplug it, wait for five minutes, and then plug it back in.
c. Remove the key from the console. Reinsert the key into the console.
d. If the treadmill still will not run, please see the front cover of this manual.
3. EVEN AFTER REMOVING THE KEY THE
CONSOLE LIGHTS
SOLUTION:
SOLUTION:
The console features a display demo mode, designed to be
used if the treadmill is displayed in a store. If the displays remain lit when
you remove the key, the demo mode is turned on. To turn off the demo mode, hold
down the Stop button for a few seconds. If the displays are still lit, CHEK THE INFORMATION
MODE and turn off the demo mode.
4.NO DISPLY
SOLUTION:
4.NO DISPLY
SOLUTION:
a. Remove the key from the console and UNPLUG THE POWER CORD. Place the treadmill in the storage position Next, remove the two indicated #8 x 3/4"
Screws (7).

Lower the treadmill . Remove the four indicated
#8 x 3/4" Screws (7), and remove the Motor Hood (66).

Next, locate the Reed Switch (48) and the
Magnet (124) on the left side of the Pulley (54). Turn the Pulley until the
Magnet is aligned with the Reed Switch. Make sure that the gap between the
Magnet and the Reed Switch is about 1/8 in. (3 mm). If necessary,
loosen the indicated #8 x 3/4" Washer Head Tek Screw (26), move the Reed
Switch slightly, and then retighten the Tek Screw. Reattach the Hood (not shown)
with the six #8 x 3/4" Screws (not shown). Run the treadmill for a few
minutes to check for a correct speed reading.

5. INCLINE PROBLEMS PROBLEM
SOLUTION:
SOLUTION:
Hold down the Stop button and the Speed increase button,
insert the key into the console, and then release the Stop button and the Speed
increase button. Press the Stop button again. Press the Incline increase or
decrease button. The treadmill will automatically rise to the maximum incline
level and then return to the minimum level. This will recalibrate the incline
system. If the incline does not calibrate, press the Stop button, and then
press the Incline increase or decrease button again. When the incline is
calibrated, remove the key from the console.
6. WAKING BELT BECOME SLOW WHILE
WAKING ON IT
SOLUTION:
SOLUTION:
a. Use only a single-outlet surge suppressor that meets all of
the specifications,
b. If the walking belt is overtightened, treadmill performance may decrease and the walking belt may become damaged. Remove the key and UNPLUG THE POWER CORD. Using the hex key, turn both idler roller bolts counterclockwise, 1/4 of a turn. When the
walking belt is properly tightened, you should be able to lift each edge of the walking belt 3 to 4 in. (8 to 10 cm) off the walking platform. Be careful to keep the walking belt centered. Then, plug in the power cord, insert the key, and run the treadmill for a few minutes. Repeat until the walking belt is properly tightened.
c. If the walking belt still slows when walked on, please see the front cover of this manual.

7. WAKING BELT SLIPPING OF TO RIGHT OR
LEFT
SOLUTION:
SOLUTION:
a. If the walking belt is off-center, remove the key and UNPLUG
THE POWER CORD. If the walking belt has shifted to the left, use the
hex key to turn the left idler roller bolt clockwise 1/2 of a turn; if the
walking belt has shifted to the right, turn the left idler roller bolt
counterclockwise 1/2 of a turn. Be careful not to overtighten the walking belt.
Plug in the power cord, insert the key, and run the treadmill for a few
minutes. Repeat until the walking belt is centered.

b. If the walking belt slips when walked on,
first remove the key and UNPLUG THE POWER CORD. Using the hex key, turn
both idler roller bolts clockwise, 1/4 of a turn. When the walking belt is
correctly tightened, you should be able to lift each edge of the walking belt 3
to 4 in. (8 to 10 cm) off the walking platform. Be careful to keep the walking
belt centered. Then, plug in the power cord, insert the key, and carefully walk
on the treadmill for a few minutes. Repeat until the walking belt is properly
tightened.

8. POOR RECEPTION ON TELEVISION
SOLUTION:
SOLUTION:
a. Make sure that the television settings are set correctly.
b. For the digital television to operate
properly, good reception is necessary. If you are using an antenna, make sure
that it is properly connected and adjusted for optimal reception.
c. Check for the problems listed below and
follow the applicable instructions.
# Ignition (black spots or horizontal streaks that appear or a picture that flutters or drifts)— Usually this is caused by interference from automobile ignition systems, neon lamps, electric drifts, or other electric appliances. Try changing the position of the treadmill or other electric appliances to correct the problem.
# Ghosts—Ghosts are caused by the television signal following two paths—one is the direct path and the other is reflected from tall buildings, hills, or other objects. Change the direction or position of the antenna to improve reception.
# Blue Screen—If the treadmill is located in the fringe area of a television station where the signal is weak, the picture may be of poor quality or a blue screen may appear. If the signal is weak, it may be necessary to install an external antenna to improve the picture.
# Fading—If blocks of the picture are missing, the picture moves around the screen, or the picture disappears, the signal may be weak. Change the direction or position of the antenna to improve reception. Make sure the television settings are set correctly .Do not use a splitter.
Note: If one of these problems appears when
the cable from a CATV company is connected, the problem may be caused by the
cable company broadcast.
9. REMOTE NOT WORKING
SOLUTION:
SOLUTION:
a. Make sure you are standing on the treadmill, holding the
remote control near the television and pointing the remote control directly at
the console.
b. If your remote control is still not functioning correctly, the batteries should be replaced; most remote control problems are the result of low batteries. See page 23 to replace the batteries.
10. NO SIGNAL ON TELEVISION
SOLUTION:
b. If your remote control is still not functioning correctly, the batteries should be replaced; most remote control problems are the result of low batteries. See page 23 to replace the batteries.
10. NO SIGNAL ON TELEVISION
SOLUTION:
a. Make sure the correct TV or AV source is selected.
b. Make sure that the antenna cable, CATV cable, or 96" A/V Wire is connected securely to the treadmill.
b. Make sure that the antenna cable, CATV cable, or 96" A/V Wire is connected securely to the treadmill.
c. Scan for broadcast or cable signals. See
page 25 to scan for signals.
d. Due to an FCC requirement, analog signals will no longer be broadcast over the air after June 12, 2009. If you wish to view television signals through an antenna after this date, you must have an antenna capable of receiving digital signals. Cable television will not be affected.
11. VOLUME TOO LOUD OR MAKING CRICKING SOUND
SOLUTION:
If the television audio makes a crackling sound when the
volume is turned up, the volume is too loud. Press the Volume increase or
decrease button on the remote control until the volume level is 80 percent.
Once the volume reaches 80 percent, adjust the volume by pressing the Volume
buttons on the console only.
12. VOLUME UP IS NOT WORKING
SOLUTION: a. If the volume cannot be turned up, the volume may have been adjusted with the remote control. Press the Volume increase or decrease button on the remote control until the volume level is 80 percent. Once the volume reaches 80 percent, adjust the volume by pressing the Volume buttons on the console only.
b. If there is no sound coming from the television, make sure the television audio is not muted.
13. HOW TO CLEAN THE TELEVISION
SOLUTION:
UNPLUG THE POWER CORD. To clean the television, wipe
the television and screen using a soft cloth with a small amount of soft
detergent. Do not use a polishing cloth, solvent, or any type of
propellant or chemical detergent such as alcohol or benzene.