REPAIRING AND NOT THROWING AWAY

Richtige Fernseher haben Röhren!

Richtige Fernseher haben Röhren!

In Brief: On this site you will find pictures and technical information about Service Modes, Circuit Diagrams, Firmware Update procedure, Disassemble procedure, Universal remote control set-up codes, Troubleshooting and more....

If you go into the profession, you will obtain or have access to a variety of tech tips databases HERE IT IS Master Electronics Repair !.

These are an excellent investment where the saying: 'time-is-money' rules. However, to learn, you need to develop a general troubleshooting approach - a logical, methodical, method of narrowing down the problem. A tech tip database might suggest: 'Replace C536' for a particular symptom. This is good advice for a specific problem on one model. However, what you really want to understand is why C536 was the cause and how to pinpoint the culprit in general even if you don't have a service manual or schematic and your tech tip database doesn't have an entry for your sick TV or VCR.

While schematics are nice, you won't always have them or be able to justify the purchase for a one-of repair. Therefore, in many cases, some reverse engineering will be necessary. The time will be well spent since even if you don't see another instance of the same model in your entire lifetime, you will have learned something in the process that can be applied to other equipment problems.
As always, when you get stuck, checking out a tech-tips database may quickly identify your problem and solution.In that case, you can greatly simplify your troubleshooting or at least confirm a diagnosis before ordering parts.

Happy repairing!
Today, the West is headed for the abyss. For the ultimate fate of our disposable society is for that society itself to be disposed of. And this will happen sooner, rather than later.

How to use the site:

- If you landed here via any Search Engine, you will get what you searched for and you can search more using the search this blog feature provided by Google. You can visit more posts scrolling the left blog archive of all posts of the month/year,
or you can click on the main photo-page to start from the main page. Doing so it starts from the most recent post to the older post simple clicking on the Older Post button on the bottom of each page after reading , post after post.

You can even visit all posts, time to time, when reaching the bottom end of each page and click on the Older Post button.

- If you arrived here at the main page via bookmark you can visit all the site scrolling the left blog archive of all posts of the month/year pointing were you want , or more simple You can even visit all blog posts, from newer to older, clicking at the end of each bottom page on the Older Post button.
So you can see all the blog/site content surfing all pages in it.

- The search this blog feature provided by Google is a real search engine. If you're pointing particular things it will search IT for you; or you can place a brand name in the search query at your choice and visit all results page by page. It's useful since the content of the site is very large.

Note that if you don't find what you searched for, try it after a period of time; the site is a never ending job !

..............The bitterness of poor quality is remembered long after the sweetness of todays funny gadgets low price has faded from memory........ . . . . . .....
Don't forget the past, the end of the world is upon us! Pretty soon it will all turn to dust!

©2010, 2011, 2012, 2013, 2014 Frank Sharp - You do not have permission to copy photos and words from this blog, and any content may be never used it for auctions or commercial purposes, however feel free to post anything you see here with a courtesy link back, btw a link to the original post here , is mandatory.
All posts are presented here for informative, historical and educative purposes as applicable within fair use. NOTHING HERE IS FOR SALE !

Tuesday 12 February 2019

SONY - KDS 50A2000_50A2010_55A2000_60A2000_60A2010_SELF DIAGNOSIS _ DISASSEMBLE PROCESS

SONY - KDS 50A2000_50A2010_55A2000_60A2000_60A2010_Self Diagnosis _ Disassemble Process


DIAGNOSIS ITEM AND PREDICTION OF MALFUNCTION LOCATION.

  • When a malfunction occurs, the Power Indicator only blinks for one of the following diagnosis items.  In case of two or more malfunctions, the item which first occurred blinks.  If the malfunction occurred simultaneously, the item with lower blink count blinks first.
  • The screen displays the result regarding all the diagnosis items listed below.  The display "0" means that no malfunction occurred.
Diagnosis item
Number of LED blinks
Probable Cause Location

Defected Symptoms

Temp.over
2
The periphery of lamp heats abnormally.

No picture /No sound.
Lamp cover
3
Lamp cover is not attached securely.
No picture / No sound.

Fan error
4
  • Fan 1, 3, 4 Power is not supplied.
  • Fan connector is not attached securely.


No picture / No sound.

Lamp driver
5
Lamp driver is faulty
No picture / No sound.

Power error
6
D5V is not supplied.
No picture / No sound.

Audio protection.
7
Speaker line shorted.
No picture / No sound
Popwer Over Voltage Protection [OVP]
8

7V is over voltage.

No picture /No sound.
Device error
9
Temperature sensors, Bus decoder Ics,{IC2000, 3150, 3200, 8804}

No picture.
Lamp error
LAMP-LED flashes.
Lamp for the light source burned out.
No picture / No sound.

DISASSEMBLY PROCEDURE

  • Pull the claws to remove the lamp cover.
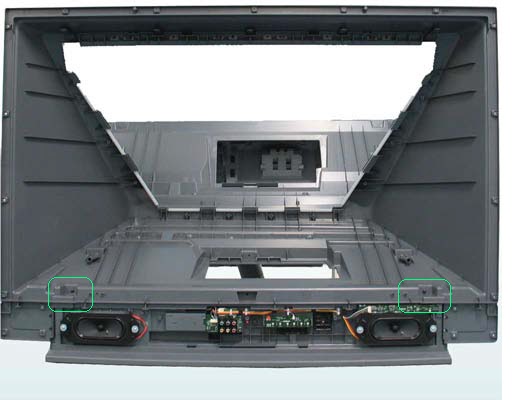
  • Remove 7 screws to open back cover.

Chassis Block

  • Connectors


ATSC SHIELD
  • Remove screws [marked in red] and connector ]marked green].
  • Remove four screws, one connector & one F-cable.
  • Disconnect 2 connectors.
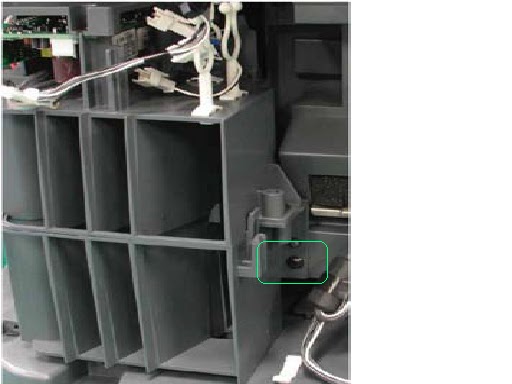
  • Remove 4 screws
  • Remove 4 screws.
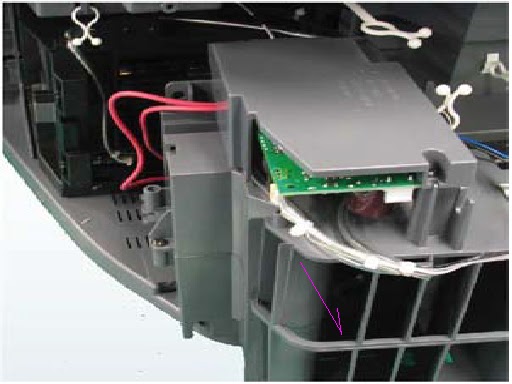
  • Be careful about the connector connected between QM board and A1 board.

MAIN SHIELD REMOVAL
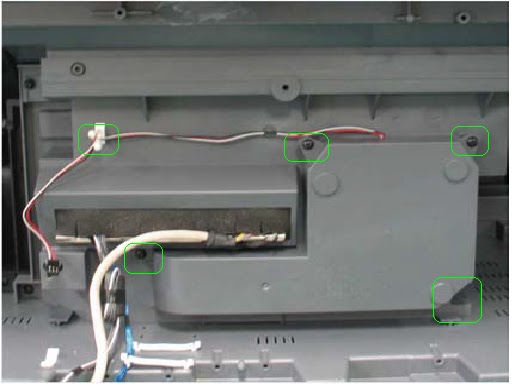
  • Remove 9 screws and 7 connectors to remove the main shield.
  • A1, B1 S1 Board
LAMP FAN UNIT


POWER BLOCK


SCIROCCO FAN


UNIT COVER ASSEMBLY


OPTIC BLOCK ASS'Y


SCREEN FRAME BLOCK ASS'Y


FRONT TERMINAL BRACKET
  • Remove 7 claws of front terminal bracket inserting the pin 5 to 10mm to the 7 square holes on the edge of front terminal bracket.  At this time, pay attention not to scratch the front terminal bracket.


MIRROR COVER BLOCK