REPAIRING AND NOT THROWING AWAY

Richtige Fernseher haben Röhren!

Richtige Fernseher haben Röhren!

In Brief: On this site you will find pictures and technical information about Service Modes, Circuit Diagrams, Firmware Update procedure, Disassemble procedure, Universal remote control set-up codes, Troubleshooting and more....

If you go into the profession, you will obtain or have access to a variety of tech tips databases HERE IT IS Master Electronics Repair !.

These are an excellent investment where the saying: 'time-is-money' rules. However, to learn, you need to develop a general troubleshooting approach - a logical, methodical, method of narrowing down the problem. A tech tip database might suggest: 'Replace C536' for a particular symptom. This is good advice for a specific problem on one model. However, what you really want to understand is why C536 was the cause and how to pinpoint the culprit in general even if you don't have a service manual or schematic and your tech tip database doesn't have an entry for your sick TV or VCR.

While schematics are nice, you won't always have them or be able to justify the purchase for a one-of repair. Therefore, in many cases, some reverse engineering will be necessary. The time will be well spent since even if you don't see another instance of the same model in your entire lifetime, you will have learned something in the process that can be applied to other equipment problems.
As always, when you get stuck, checking out a tech-tips database may quickly identify your problem and solution.In that case, you can greatly simplify your troubleshooting or at least confirm a diagnosis before ordering parts.

Happy repairing!
Today, the West is headed for the abyss. For the ultimate fate of our disposable society is for that society itself to be disposed of. And this will happen sooner, rather than later.

How to use the site:

- If you landed here via any Search Engine, you will get what you searched for and you can search more using the search this blog feature provided by Google. You can visit more posts scrolling the left blog archive of all posts of the month/year,
or you can click on the main photo-page to start from the main page. Doing so it starts from the most recent post to the older post simple clicking on the Older Post button on the bottom of each page after reading , post after post.

You can even visit all posts, time to time, when reaching the bottom end of each page and click on the Older Post button.

- If you arrived here at the main page via bookmark you can visit all the site scrolling the left blog archive of all posts of the month/year pointing were you want , or more simple You can even visit all blog posts, from newer to older, clicking at the end of each bottom page on the Older Post button.
So you can see all the blog/site content surfing all pages in it.

- The search this blog feature provided by Google is a real search engine. If you're pointing particular things it will search IT for you; or you can place a brand name in the search query at your choice and visit all results page by page. It's useful since the content of the site is very large.

Note that if you don't find what you searched for, try it after a period of time; the site is a never ending job !

..............The bitterness of poor quality is remembered long after the sweetness of todays funny gadgets low price has faded from memory........ . . . . . .....
Don't forget the past, the end of the world is upon us! Pretty soon it will all turn to dust!

©2010, 2011, 2012, 2013, 2014 Frank Sharp - You do not have permission to copy photos and words from this blog, and any content may be never used it for auctions or commercial purposes, however feel free to post anything you see here with a courtesy link back, btw a link to the original post here , is mandatory.
All posts are presented here for informative, historical and educative purposes as applicable within fair use. NOTHING HERE IS FOR SALE !

Saturday 16 March 2019

HOW TO ENTER SERVICE MODE - TOSHIBA 32AF41 - SELF DIAGNOSTIC FUNCTION

HOW TO ENTER SERVICE MODE - TOSHIBA 32AF41 - SELF DIAGNOSTIC FUNCTION


SERVICE MODE
  • Press MUTE button once on Remote Control.
  • Press MUTE button again to keep pressing.
  • While pressing the MUTE button, press MENU button on TV set.
DISPLAYING THE ADJUSTMENT MENU
Press MENU button on TV.
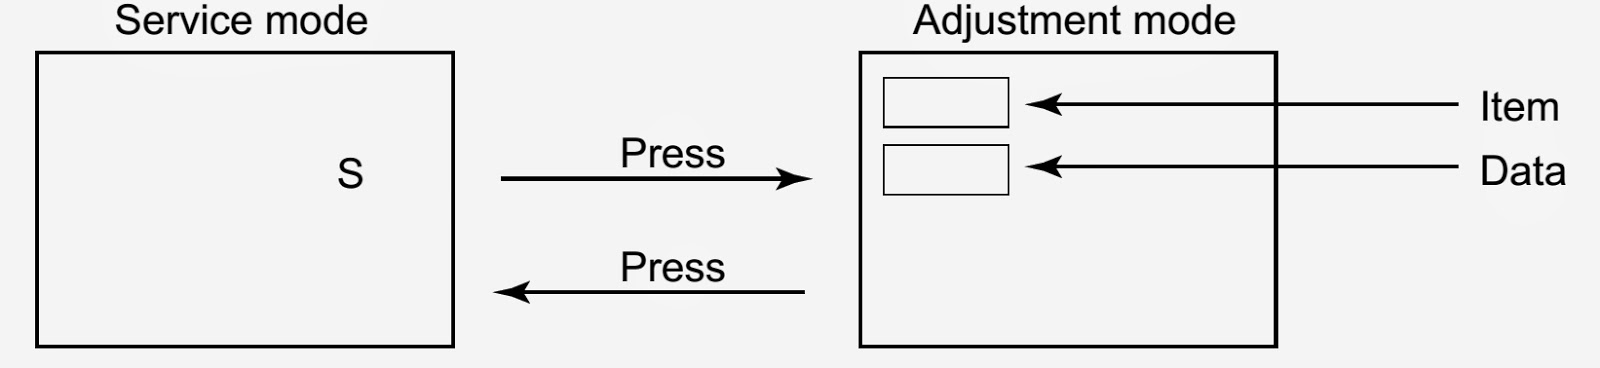
KEY FUNCTION IN SERVICE MODE
  • A single horizontal line ON/OFF: TV (ANT)/VIDEO button (on TV)
  • Test signal selection : TV (ANT)/VIDEO button (on Remote)
  • Selection of the adjustment items : Channel / (on TV or Remote)
  • Change of the data value : Volume / (on TV or Remote)
  • Adjustment menu mode ON/OFF : MENU button (on TV)
  • Initialization of the memory (QA02) : RECALL+Channel button on TV
  • Initialization of the self diagnostic data: RECALL+Channel button on TV
RCUT”selection : 1 button
GCUT”selection : 2 button
BCUT”selection : 3 button
“CNTX”selection : 4 button
“COLC”selection : 5 button
“TNTC”selection : 6 button
Test audio signal ON/OFF (1kHz) : 8 button
Self diagnostic display ON/OFF : 9 button.
SELECTING THE ADJUSTING ITEMS
Every pressing of CHANNEL button in the service mode changes the adjustment items in the order of table. (button for reverse order)
ADJUSTING THE DATA
Pressing of VOLUME/ button will change the value of data in the range from 00H to FFH. The variable range depends on the adjusting item.
EXIT FROM SERVICE MODE
Pressing POWER button to turn off the TV once.
INITIALIZATION OF MEMORY DATA OF QA02
After replacing QA02, the following initialization is required.
  • Enter the service mode, then select any register item.
  • Press and hold the RECALL button on the Remote, then press the CHANNEL sbutton on the TV. The initialization of QA02 has been completed.
  • Check the picture carefully. If necessary, adjust any adjustment item above.
  • Perform “Programming Channel Memory” on the owner’s manual.
CAUTION: Never attempt to initialize the data unless QA02 has been replaced.
TEST SIGNAL SELECTION
Every pressing of TV/VIDEO button on the Remote Control in the Service mode, changes the built-in test patterns on screen in the following order.
Press “8” button while any built-in test pattern to on the screen to output the 1 kHz sound. Press the button again to cut off the sound.
Note: If the video cable is connected to the VIDEO1 INPUT jack, the built-in pattern signals are not displayed.
[The signals marked with [gray]  are not usable to display in the Test signal for some model.]
CLICK ON THE PICTURES TO ZOOM
SELF DIAGNOSTIC FUNCTION
Press “9”button on Remote Control during display of adjustment menu in the service mode.  The diagnosis will begin to check if interface among IC’s are executed properly.
During diagnosis, the following displays are shown.
The item marked with [GRAY] is not usable to display in the SELF DIAGNOSTIC FUNCTION for some model.
DESIGN MODE
Select the Service mode.
  • While pressing RECALL button on Remote and press MENU button on TV.
  • Press MENU button on TV.
  • When QA02 is initialized, items “OPT0”and “OPT1”of DESIGN MODE are set to the data of the representative model of this chassis family.  Therefore, because ON-SCREEN specification remains in the state of the representative of model. This model is required to reset the data of items “OPT0”and “OPT1”
SELECTING THE ADJUSTING ITEMS
Every pressing of CHANNEL button in the design mode changes the adjustment items. (button for reverse order)
ADJUSTING THE DATA
Pressing of VOLUME / button will change the value of data.
ADJUSTING ITEMS AND DATA IN SERVICE MODE
ADJUSTING ITEMS AND DATA IN DESIGN MODE