
About replace the microprocessor
with a new one.
[A]: Mask ROM (With
software). No need to write in of
software to the microprocessor.
[B]: Flash ROM (With
software). Usually no need write in
software. But when the software was
updated, you should write in of the new software to the microprocessor or flash
ROM. Please check the software version.
[C]: empty Flash ROM (Without
software). You should write in the
software to the microprocessor or flash ROM.
Update procedure [Writing main
microprocessor procedure.]
IC300 [MB90F352PFM-G ST-15S1 FOR N]
Necessary equipment
Windows PC [O/S: windows 2000 or
Windows XP with serial port.
RS-232C cable straight type [9
pin male – 9 pin female]
Connection JIG: ST-7001 DAB/MICOM
UPGRADE BOARD [90M-ST7001JIG]
Writing software [flashprog 1
6lx-v01/11.exe]
Writng data
[Marantz_DABxxxx.mhx]. Note: xx is
version number
Install procedure.
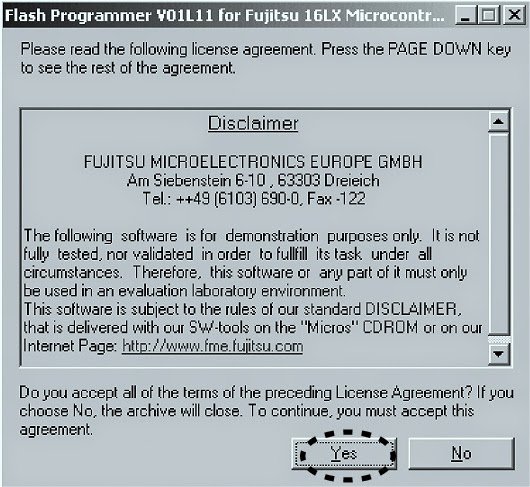
Double click
flashprog16lx-v01/11.exe

* Click "Yes"
* Click Next

* Check complete, and click next

* Click install

* The status bar appears; click Next


Writing Procedure
* Disconnect the mains cord from
the unit.
* Connect RS 232C on the connection
JIG and Serial Port of windows PC with RS-232C cable.
* Turn the Mode Selector switch
[SW401] of connection JIG to the MICOM UPGRADE side.
* Connect the connection JIG to
SERVICE PORT in the rear panel of the unit.
* Connect the mains cord to the
unit.
* Press the Power On/Off button, on
the unit. Launch up the FUJITSU Flash
MCU programmer (FMC16LX)

* Click Start > Programs > FUJITSU FLASH MCU programmer & FMC16lx.
* Click 'Set Environment"


* Choose the using serial port and click OK.
* Choose MB90F352C/S/CS in Target Micro-controller.


* Select writing data and click Open.
* Click 'Full operation [D+E+B+P]
* Click OK.


* Close the FUJITSU MCU Programmer.
* Disconnect mains cord from the
unit.
* Disconnect JIG from the unit.
HOW TO UPDATE DAB MICROPROCESSOR – MARANTZ ST-15S1 – DAB / FM / AM Tuner

Necessary Equipment
* Windows PC (OS: Windows2000 or Windows XP) with parallel port.
* Parallel cable straight type [25 pin male – 25 pin female]
* Connection JIG: ST-7001 DAB/MICOM UPGRADE BOARD
(90M-ST7001JIG)
* Writing software and several files [DAB folder: include fast
DRE310 Programmer.exe, install.bat, etc….]
* Writing data [Flash _DRE310_EVMSP |
SLAVE_20050701_TBK_01_002_HE.bin] File
name will change according to release date.
Install procedure
Press right button of mouse on the install.bat, and choose
the Edit in menu.
The text which copies ‘wdpnp.sys’ and ‘windrvr.sys’ file to
the system folder of Windows is described.
Check the following texts. When text
is different, correct it, the save as filename.


* Click X icon and close.
* Double click 'install.bat'
* Command prompt is launched, and
files are copied.
* Check that the files have been
copied.
* Press Enter or Space button, and
command prompt closes automatically.

Writing procedure.
* Disconnect the mains cord from
the unit.
* Connect parallel connector on the
connection JIG and Parallel Port of windows PC with parallel cable.
* Turn the MODE SELECTOR switch
[SW401] of the connection JIG to the DAB UPGRADE side.
* Connect the connection JIG to
SERVICE PORT in the rear panel of the unit.
* Connect mains cord to the unit.
* Press the POWER ON/OFF button,
and turn on the unit.
* Double click fast DRE310 programmer.exe

* DRE310| System Programmer is
launched.
* The same as File Name of
DataFlash is displayed.
* When a file name is different,
change is required for the right file name.
* Check include this device in DataFlash.

* Choose Erase operation.
* Click execute.

* The data of DAB microprocessor is
erased. Erased Ok, appears in status.
* Choose Program and Verify in
Operation.

* Click Execute.
* Writing data is written and
verify.
* Click X icon, and close.

Press the Power On/Standby
button, and turn off the unit.
Disconnect mains cord from the
unit.
Disconnect connection JIG from
the unit.