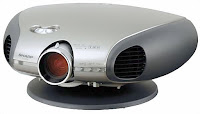
 1 - Sharp XV Z90U. Sharp DT 200 DMD Projector – how to disassemble, how to reset the lamp

This
SHARP projector uses a DMD chip. This very sophisticated chip contains 480,000
pixels. As with any high technology electronic equipment such as large screen
TVs, video systems and video cameras, there are certain acceptable tolerances
that the equipment must conform to.
This
unit has some inactive pixels within acceptable tolerances which may result in
inactive dots on the picture screen. This will not affect the picture quality
or the life expectancy of the unit.
Service
work should be performed only by qualified service technicians who are thoroughly
familiar with all safety checks and servicing guidelines.
Be
sure to wear sun-glasses when servicing the projector with the lamp turned “on”
and the top enclosure removed.
Lamp Replacement
Note:
Since
the lamp reaches a very high temperature during units operation replacement of
the lamp should be done at least one hour after the power has been turned off.
(to allow the lamp to cool off.)
Installing
the new lamp, make sure not to touch the lamp (bulb) replace the lamp by
holding its reflector.
[Never
turn the power on without the lamp to avoid electric-shock or damage of the devices
since the stabilizer generates high voltages at its start.]
Connection Pin Assignments

REMOVING OF MAJOR PARTS
Removing the swivel stand and the lamp box.
1-1.
Remove lock lever, and remove the swivel stand.
1-2.
Loosen 1 scrwew, and remove the lamp door .
1-3.
Loosen 3 screws, and take out a lamp box.
Removing the side covers and the top body.
2-1.
Push front end of the side cover from bottom, and remove a hook.
2-2.
Pull the side cover in the direction of the arrow, and remove it.
2-3.
Remove 6 screws and 1connector, and remove a top body.
Removing the main PWB.
3-1.
Remove 6 screws.
3-2.
Remove each connector on the main PWB.
Removing the power unit.
4-1.
Remove each connector on the power PWB.
4-2.
Remove 2 screws, and remove the power unit fan.
4-3.
Remove 3 screws, and take out the power unit assembly.
4-4.
Remove 4 screws, and remove power shield.

Removing the Ballast unit.
5-1.
Remove lens shift knob.
5-2.
Remove 2 screws, and remove the ballast socket.
5-3.
Remove 3 screws, and remove the ballast unit.
5-4.
Remove shielding plate, and remove 2 connectors on the ballast PWB.
5-5.
Remove 2 screws, and remove ballast PWB.
Removing the optic mechanism unit.
6-1.
Remove a connector.
6-2.
Remove 6 screws, and remove the optic mechanism Unit
Removing the each other PWBs.
7-1.
Remove 1 screw, and remove front R/C receiver PWB unit .
7-2.
Remove 1 screw, and remove LED PWB unit.
7-3.
Remove 1 screw, and remove a terminal-2 PWB unit.
7-4.
Remove 2 screws, and remove an AC socket.
7-5.
Remove 1 screw, and remove rear R/C receiver PWB unit.
7-6.
Remove 1 screw, and remove DVI-TAN1 PWB unit.
Removing the formatter PWB. Removing the formatter PWB.

Precautions in replacing the DMD chip
Note:
Be careful not to allow dust and fingerprint on the cover glass of DMD chip and
prism surface of optical engine.
1.
When you fix 4screws of backer plate assembly, press backer plate to formatter
PWB and fix by cross multiply step by step.
2.
If something shade appears on the projection screen like Fig1, release 2 screws
on mirror adjusting plate and move that plate to adjust illumination area of
DMD chip.
Precautions in setting up the DMD (Digital Micro mirror Device)
unit
Before
connecting the formatter PWB to the optical engine, take the following steps.
Look at the voltage rank marking that is on the DMD itself. Referring to this
marking, set the DIP switches on the formatter PWB. And connect this PWB to the
optical engine. Wrong settings will adversely affect the system performance.

Outline of the optical unit
Distinction
between long and short focal length lens
•
Long focal length lens: focus ring width: about 18 mm > XV-Z90U
•
Short focal length lens: focus ring width: about 27 mm > DT-200


Caution when repairing without top cabinet
To
repair this set without top cabinet, attach the left side body beforehand.
(Since the exhaust heat gets in around the set and the temperature sensor
detects it giving the TEMP error and the lamp goes off.)
RESETTING THE TOTAL LAMP TIMER
You
need to reset the lamp timer every time you replace the lamp and confirm it is
reset on the “Lamp Timer” menu.
•
The warning lights on the projector indicate problems inside the projector.
•
There are two types of warning lights: a TEMPERATURE WARNING indicator that
warns you when the projector is too hot, and a LAMP REPLACEMENT indicator that warns
you when to change the lamp.
•
If a problem occurs, either the TEMPERATURE WARNING indicator or the LAMP
REPLACEMENT indicator will illuminate in red. After turning off the power,
follow the procedures given below.
•
If the TEMPERATURE WARNING indicator lights up, follow the above possible
solutions and then wait until the projector has cooled down completely before
turning the power back on. (At least 5 minutes.)
 •
If the power is turned off and then turned on again, for example during a brief
rest, the may be triggered, preventing the power from going on. Should this
occur, unplug the power cord from the wall outlet and plug it back in again.
•
If the power is turned off and then turned on again, for example during a brief
rest, the may be triggered, preventing the power from going on. Should this
occur, unplug the power cord from the wall outlet and plug it back in again.2 - Sharp XV Z90U, Sharp DT 200 DLP theatre projector FULL circuit diagram, how to enter the service mode, exploded view:
RESETTING THE TOTAL LAMP TIMER
You
need to reset the lamp timer every time you replace the lamp and confirm it is
reset on the “Lamp Timer” menu.
How to reset the total lamp timer.
•
The warning lights on the projector indicate problems inside the projector.
•
There are two types of warning lights: a TEMPERATURE WARNING indicator that
warns you when the projector is too hot, and a LAMP REPLACEMENT indicator that warns
you when to change the lamp.
•
If a problem occurs, either the TEMPERATURE WARNING indicator or the LAMP
REPLACEMENT indicator will illuminate in red. After turning off the power,
follow the procedures given below.

•
If the TEMPERATURE WARNING indicator lights up, follow the above possible
solutions and then wait until the projector has cooled down completely before
turning the power back on. (At least 5 minutes.)
•
If the power is turned off and then turned on again, for example during a brief
rest, the may be triggered, preventing the power from going on. Should this
occur, unplug the power cord from the wall outlet and plug it back in again.
Entering the adjustment process mode
There
are following two methods.
Press the SW2002 on the MAIN PWB.
Press the following keys in this order.
ADJ UP > ADJ UP > ADJ DOWN > ADJ DOWN > ADJ RIGHT
> ADJ LEFT > ENTER.

Adjustment
mode process menu

Main unit schematic


Formatter schematic


Power unit schematic

Cabinet and mechanical part exploded view

Product
type Theatre Projector
Model
XV-Z90U/DT-200
Video
system PAL/PAL 60/PAL-M/PAL-N/SECAM/NTSC 3.58/NTSC 4.43/DTV
480i/480P/720P/1080i
Display
method DLP chip, RGB optical shutter method
DLP
panel Panel size: 0.55” (140mm)
Display
method: Single Panel Digital Micro mirror Device (DMD™) by Texas Instruments
Drive
method: Digital Light Processing (DLP)
No.
of dots: 480,000 dots (800 [H] x 600 [V])
Lens
1–1.2 x zoom lens, F1.75–2.04, f=28–33.5 mm (XV-Z90U) F2–2.4, f=16.9–20.2 mm
(DT-200)
Projection
lamp 150 W SHP lamp
Horizontal
resolution 520 TV lines (NTSC 3.58 input)
RGB
input signal 15-PIN MINI D-SUB CONNECTOR (INPUT 2):
RGB
separate/composite sync/sync on green type analogue input: 0–0.7 Vp-p,
positive,75 Ω terminated
HORIZONTAL
SYNC. SIGNAL: TTL level (positive/negative) or composite sync (Apple only)
VERTICAL
SYNC. SIGNAL: Same as above
Pixel
clock 12–110 MHz
Vertical
frequency 43–75 Hz
Horizontal
frequency 15–70 kHz
Computer
control signal 9-pin D-sub connector (RS-232C Port)
Rated
voltage AC 100–240 V
Input
current 3.6 A
Rated
frequency 50/60 Hz
Power
consumption 200 W
The SharpVision XV-Z90U Projector is a SVGA Home Theater Projector. This lamp based projector is capable of displaying 600 Lumens at its brightest setting with a native resolution of 800x600 . The internal DLP technology touts higher contrast, less visible pixels and more portability. The unique projector lens has the ability to be shifted to allow greater flexibility in positioning the projector relative to the screen. This projector was first available for purchase in October 2002 and has been discontinued by SharpVision.